Construction week 12: the first floor

This week, the team finished installing the ledger boards, hung our floor joists (supplied by Kott), finished the interior structural framing, and set a floor on top of the floor joists. Construction is starting to resemble a more traditional site-framed home. Over the weekend, we had a family picnic in the house and even had our first official guests over to join us (of course we all wore hard hats).

We forgot to mention on the blog that last week was International Passive House Days. There were several events and tours happening around the city. There is rising interest. Mark also gave a couple tours of our place (outside of the PH week events). One to a group from NRCan (Natural Resources Canada) and one to a group of fine folks taking a Passive House course. Seeing as how our build has been garnering interest and tour requests, we will post a sign-up form (eventually) and open them up to the public. We are all-for raising awareness for Passive House...we are also pretty proud of what we’re building and happy to show it off. We'll get that going soon.

Next week, work will be geared towards the main floor walls. 

In the new toasty basement

In the new toasty basement

Welcome to the main floor

Welcome to the main floor

Comment
Share

3-Day framing time lapse

With the amazing weather we've had for the last while we've been able to make some great progress on framing. This video shows three days' work installing the structural walls and first floor joists.

The joists are all open web joists, which will allow us to run all of our electrical, mechanical and plumbing services easily within the thickness of the floor, without requiring unsightly bulkheads or drop ceilings. Because of the significant reduction in heating demand afforded by our Passive House design, we will not need to install any traditional large metal ductwork usually seen for furnaces and A/C. The only ductwork we will need to run will be for our ventilation system, which uses 3" flexible tubing easily run through the open web joists and inside 2x4 walls.

The spans in the design were carefully limited so that we could use a 9.5" deep truss and maximize ceiling heights. The 12" spacing will create a more rigid floor to accommodate the installation of tile floor above. 

Next step is to install 3/4" plywood floor sheathing, and then very soon the first of our exterior walls!

Comment
Share

Construction weeks 10 & 11: foundation complete

Last I wrote, I left us on a cliffhanger, didn’t I? Wood and hammers and nails — oh my! 

Oh no.

I jumped the gun. Much prep was yet required before framing could begin in earnest. Those tasks included:

1. Glued the last few stacks foam to the outside of our basement walls

All that foam combined (R-4/inch) should have an R-value of 74. (Ontario Building Code requirements for a foundation are as low as R-12 on the walls only).

Last layers of foam held in place while glue sets.

Last layers of foam held in place while glue sets.

2. Installed the frost skirt

Because the bottom of our foundation isn’t quite deep enough to guarantee that it will be below the frost line on any given winter, we needed a frost skirt. (This is a standard detail for shallow foundations in Canadian construction). It’s a thin layer of foam installed horizontally around the permitter of the building at foundation depth. Typical frost penetration is around 4 feet in Ottawa, but last years' exceptionally cold winter brought that to 6’. A frost skirt is used on shallow foundations to extend the path that frost must travel to reach the bottom of a foundation. Bad news if it were to happen — expansion, contraction (heaving) leads to cracks and structural damage. 

Frost skirt and overlapping and waterproofing membrane.

Frost skirt and overlapping and waterproofing membrane.

3. Waterproofed the foundation

Using a Nudura waterproofing membrane, which is a peel-and-stick rubberized sheet. This required some patience because the foam had to be cleaned and dried prior to application. It wasn’t adhering as snugly as we’d have like to see, either. Some temporary strapping helped with this. A dimple board, held on place with metal fasteners, was layered over top of the membrane. Bam. Waterproofed.

4. Set up drainage

Water shall not pass (our membrane) and will weep if it dares to encroach. Weeping tile was placed around the perimeter of the foundation and connected to the storm sewer. There is a filter sock around it to prevent it from filling up with sand. (Am I the only one who finds the term weeping tile odd? There is no porcelain or ceramic whatsoever. It’s a plastic pipe with some nylon around it. Weeping tile does sound dramatic, however. I therefore think it sticks).

Dimple board and weeping tile.

Dimple board and weeping tile.

5. City inspection

Our city inspector wanted to check things out prior to back fill. So he paid a visit. He decided he wanted to throw in an additional check, which threw a bit of a wrench in to our coordination efforts (see next step).

6. Backfill

There were two steps to the backfill process. First we covered the drain tile with clean gravel (as to not clog the nylon with sand and silt straightaway). Cue city inspector – who gave us the thumbs up. And then we filled up the hole with native fill (some of which has been sitting around and taking up precious room on site and some that was stored off-site).

My oh my. What a difference this back fill has made. Now that half of the foundation walls lie underground, it actually looks and feels like a basement from the outside. 

Backfill stage 1: clean fill

Backfill stage 1: clean fill

Backfill stage 2: native fill

Backfill stage 2: native fill

7. Sill plate leveling and installation

This sill plate is what our first floor walls rest on. It’s a 2 x 6” piece of lumber that’s installed on top of the concrete, leveled with grout. 

sill-plate-ottawa-passivehouse

8. Ledger board and air barrier prep

The ledger board is what our first floor floor rests on. Remember those ledger bolts that were screwed into the concrete? These hold up the 2 x 10” ledger board. But out air barrier goes up first – Siga MAJPELL 5 membrane. Mark had a Periscope broadcast on this last week. They installed it with excess available to overlap once the second/main floor goes up. (Gotta keep that air barrier line as clean and streamlined as possible!)

Air barrier detail over ledger bolts

Air barrier detail over ledger bolts

Ledger board install

Ledger board install

And so forth

That’s the house up-to-date. Additionally, we had a few deliveries made and spent some time shuffling our construction materials around as we suddenly had a lot more room with the backfill out of the way. Our neighbours were no doubt pleased to regain their front lawn. And we lost a couple days due to bad (wet) weather.

Lotsa stuff out front. 

Lotsa stuff out front. 

Behind the scenes, there was a bit of good news. We applied for our first construction mortgage withdrawal. Mark explained our house build to the appraiser, and why our breakdowns/allotments should be different. The appraiser accepted Mark’s breakdowns — whoot! We have been reimbursed for Phase 1. Foundation complete. This helps alleviate some of our financial pressures.

For next week: wood and hammer and nails — oh my! 

Comment
Share

Air sealing begins

Tape detail on ledger anchor bolts.  

Tape detail on ledger anchor bolts.  

As we prepare for framing we've been starting the very important task of eliminating air leakage. Here is a shot of where the floor ledger bolts are penetrating the air barrier membrane, and the tape detail we are using to ensure no leakage. 

Backfill!

image.jpg

The backfill started yesterday! Really changes the feeling of the house in the site. Looking forward to framing this week! 

Comment
Share

Meet our builders: Cornelis Grey Construction

Exterior rendering of Casey and Natasha Grey's Passive House in Manotick

Exterior rendering of Casey and Natasha Grey's Passive House in Manotick

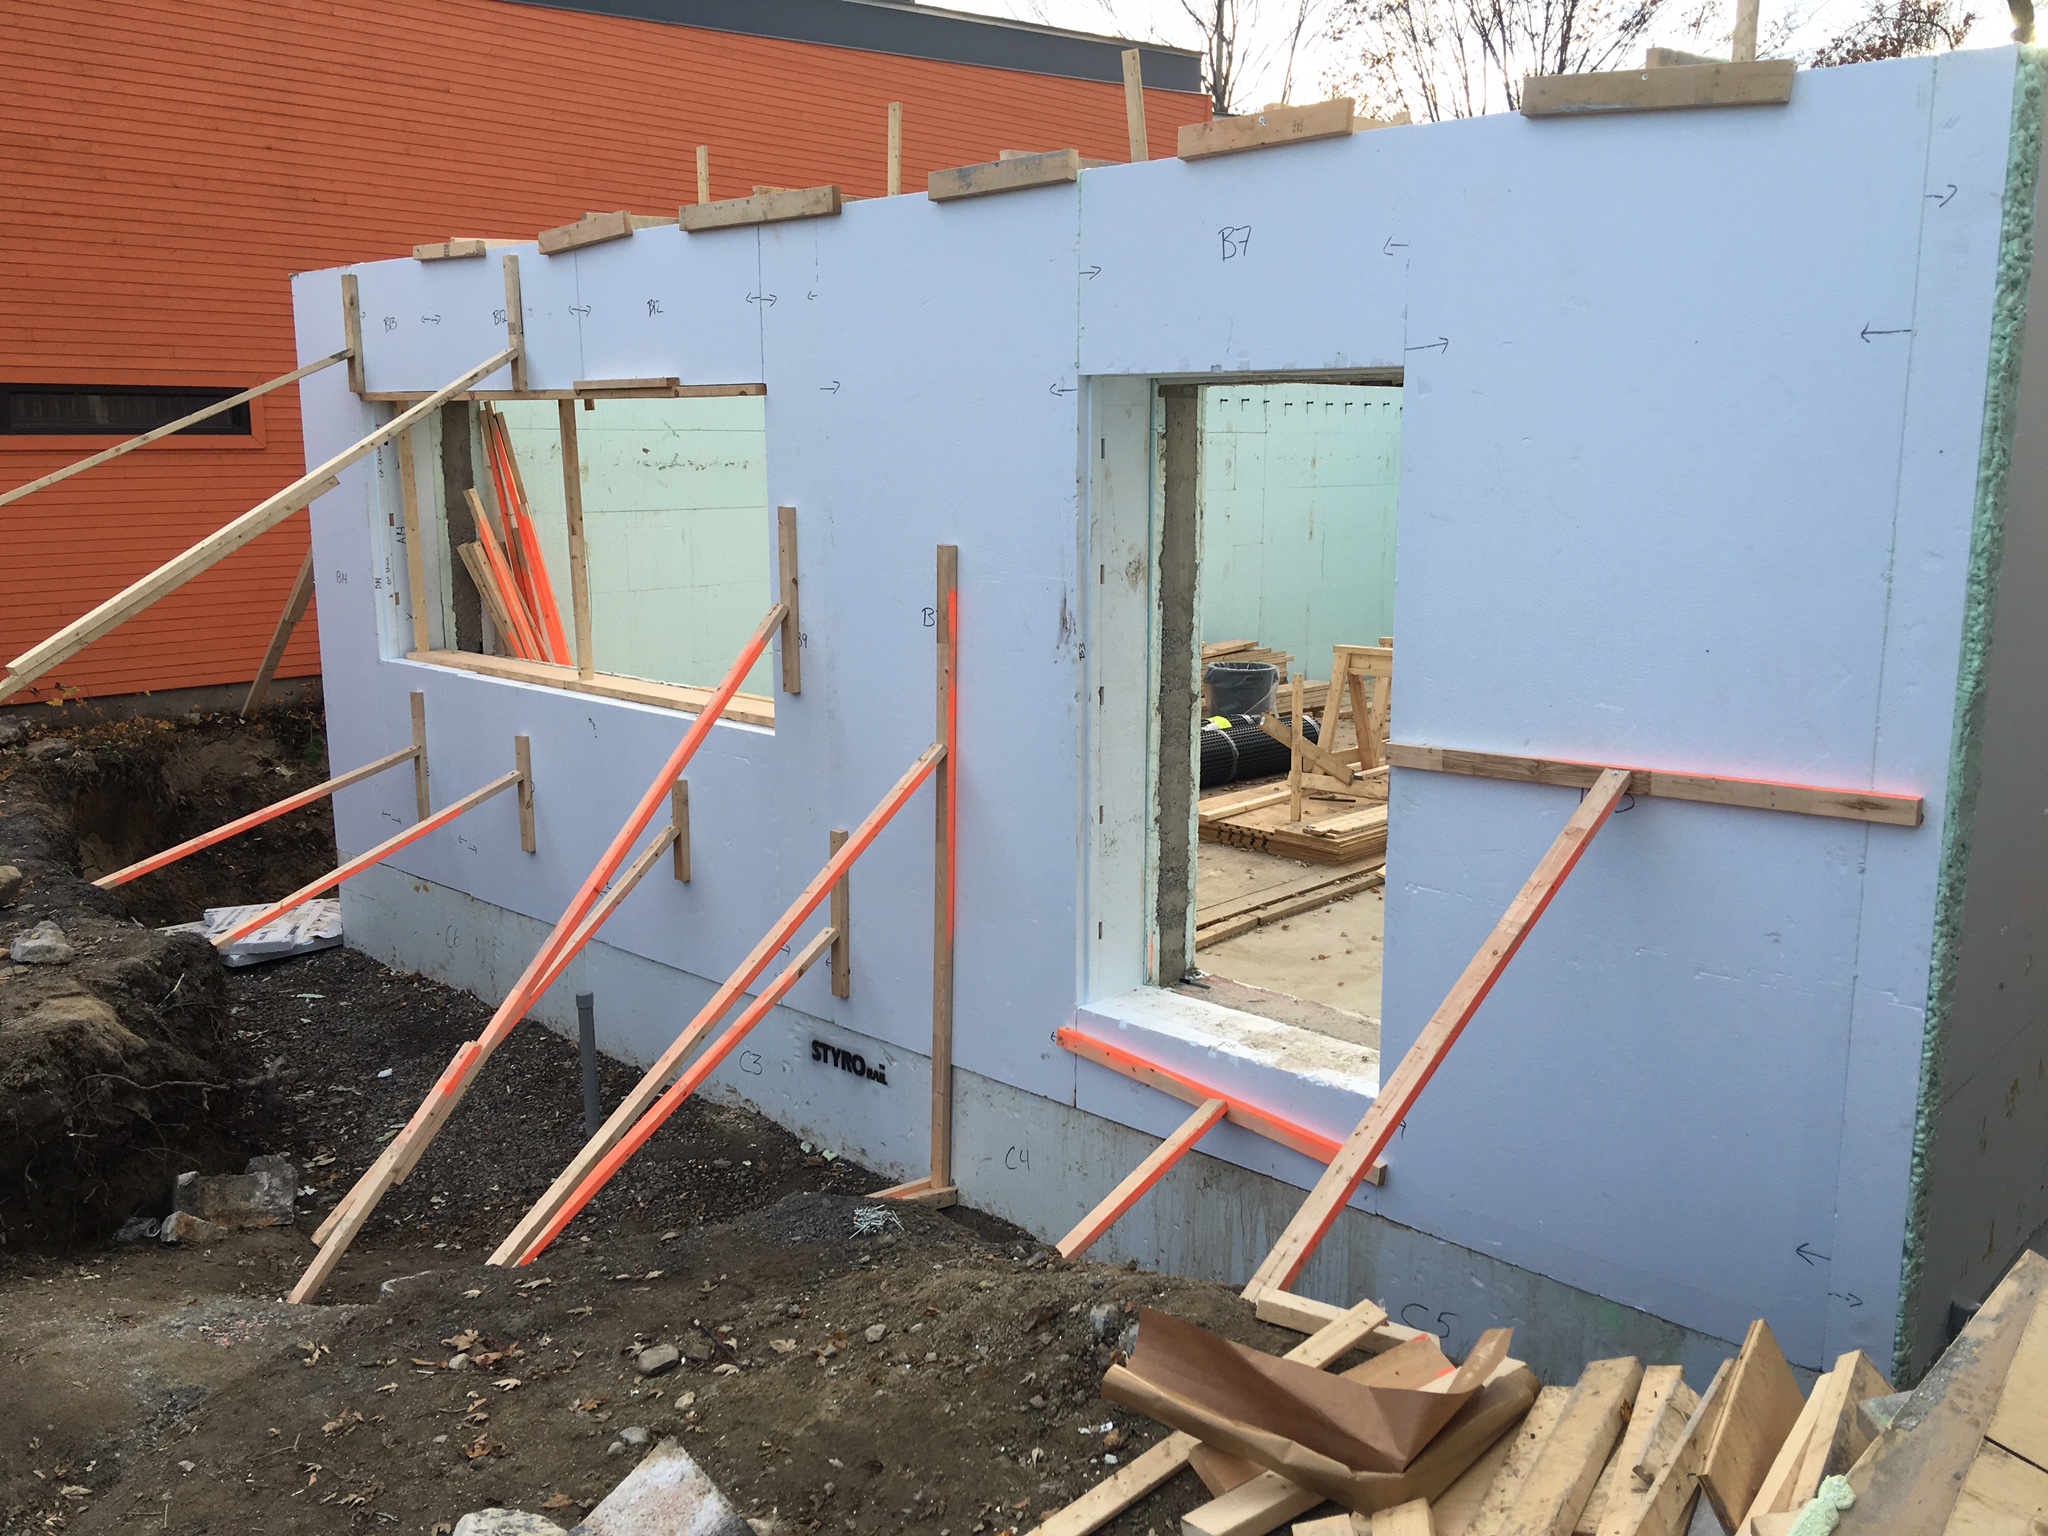
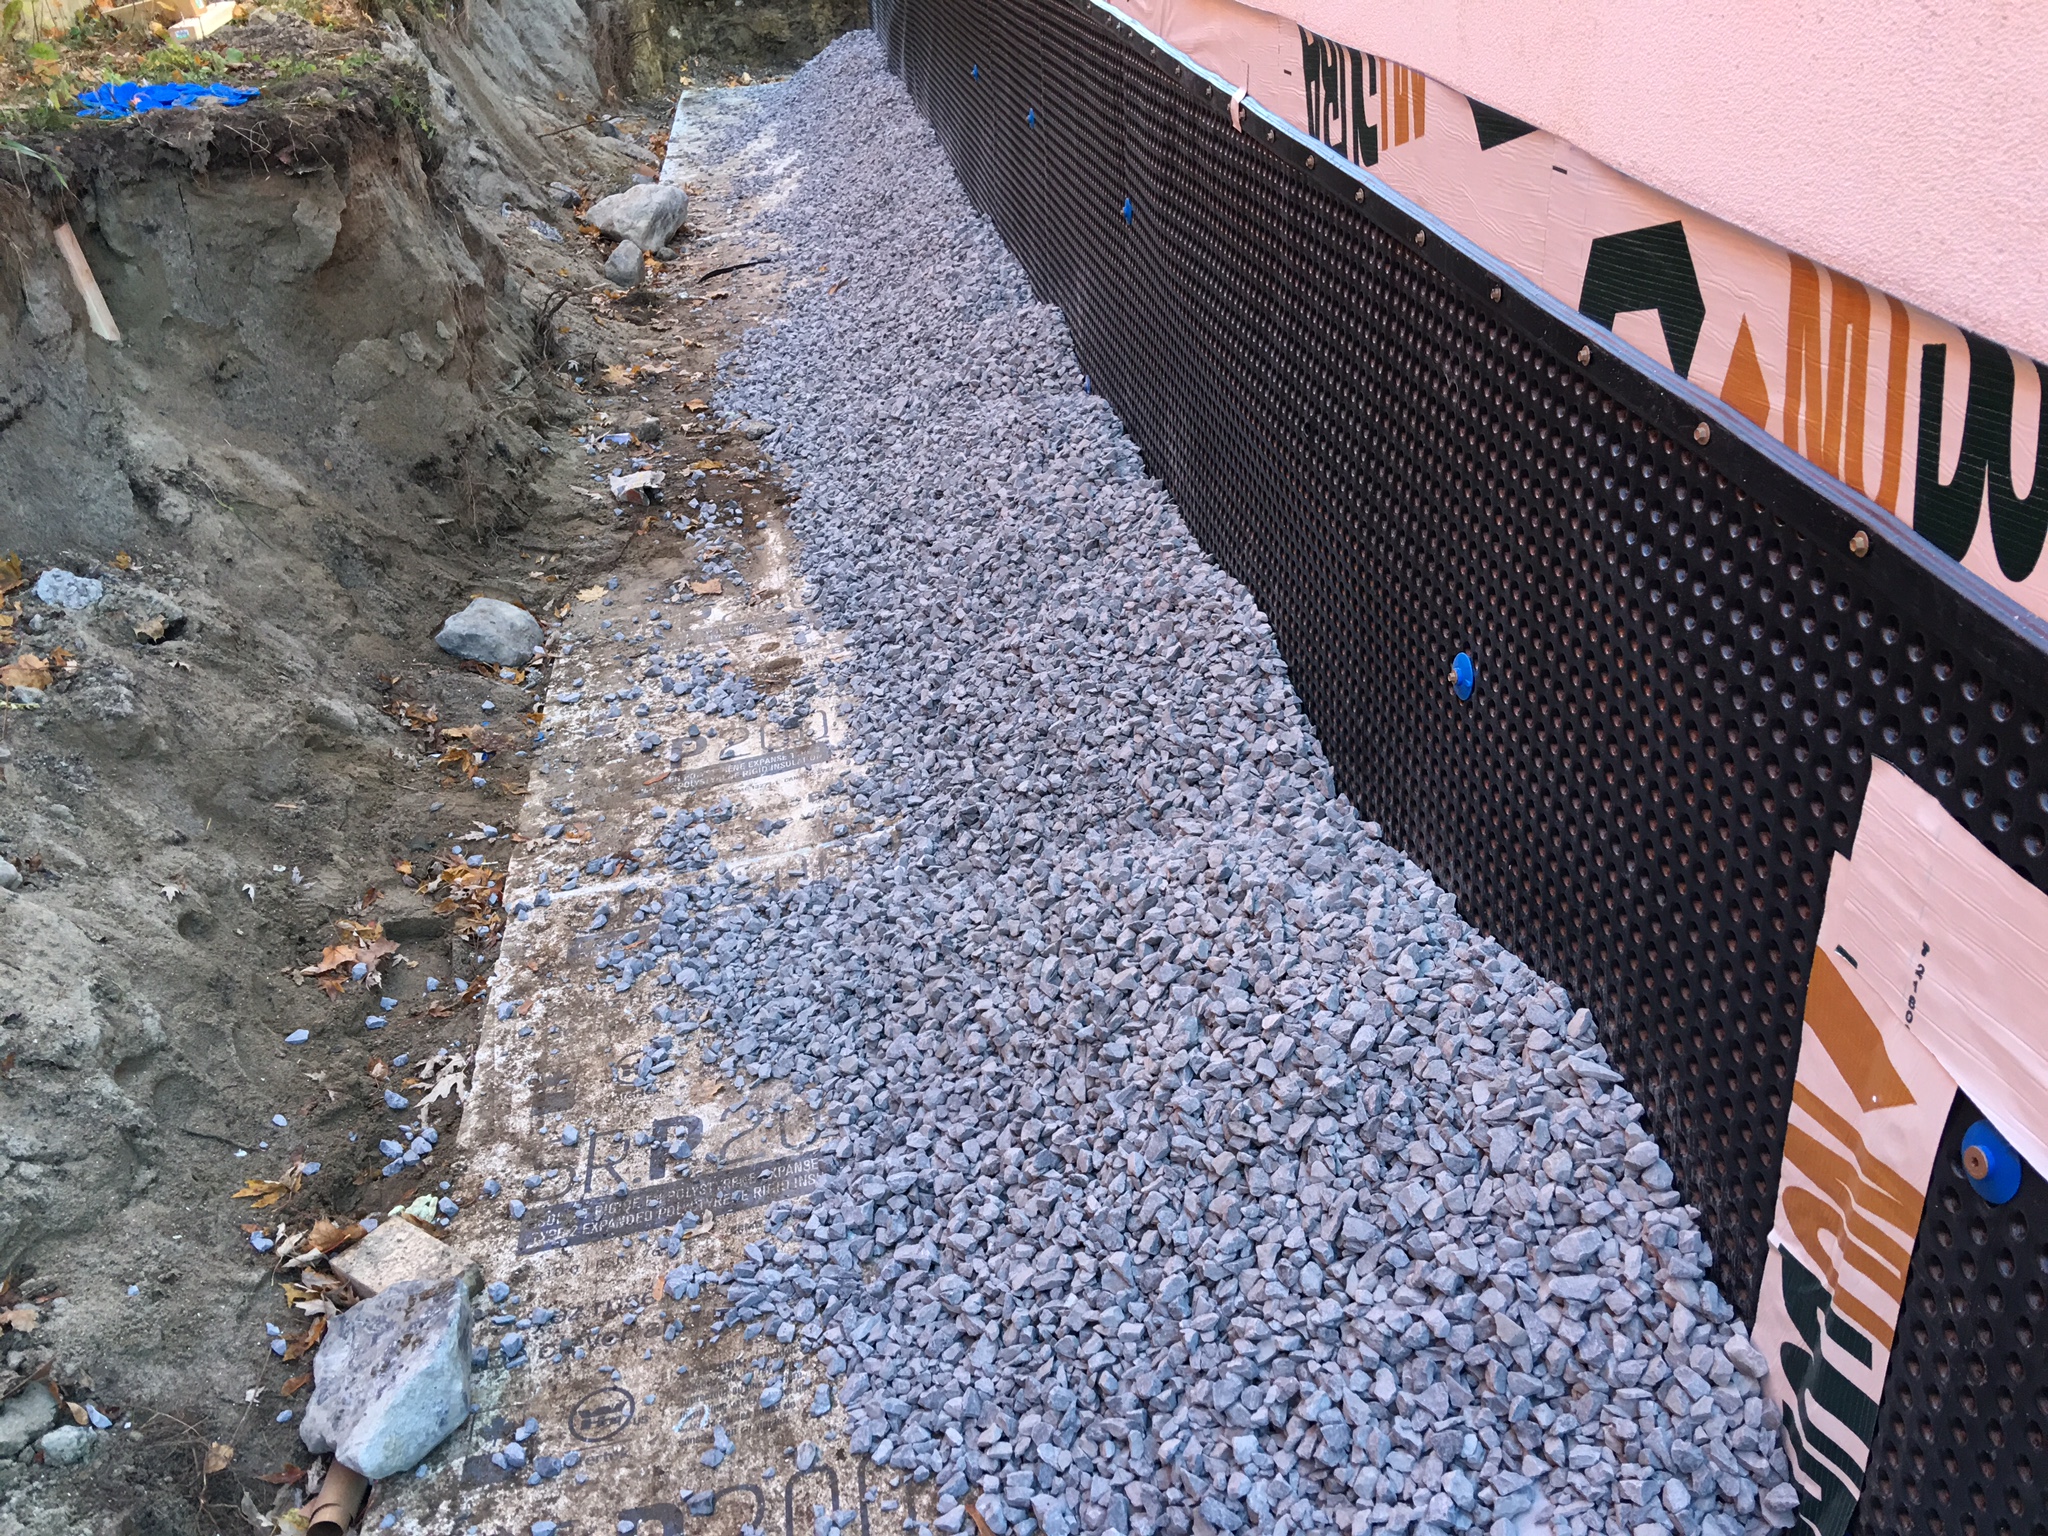
[Post written by Casey Grey of Cornelis Grey Construction]

Working with Mark, Meghan and PLOTNONPLOT was a must for us. Since we had already built a Passive House for ourselves, we obviously knew we had values that aligned. This partnership was meant to be. Ultimately, the building industry needs to change and there’s no way one person can do it alone. We all have to work together if we’re going to have any sort of impact in this life.

Although the term “Passive House” is widely unknown, “saving money” is something we can all relate with. In a world where everything seems to become more and more expensive, it’s about time we start saving some money. That is what Passive Houses do. They save energy which, in turn, saves money.

As a Builder who lives and works in a Passive House, I can vouch for all the benefits. It was the smartest decision (other than marrying my wife, of course) that I have made in my life. With solar panels on the roof that are a part of the MicroFIT program, we actually make money every year instead of paying energy bills. I’m also giving my family healthier indoor air quality and a more comfortable place to live. To top it all off, all these decisions help the environment in more ways that I can count.

I’m sure you’re all tired of hearing about saving the environment so I ask you to think of it differently. A way that actually makes more sense. It’s not the environment we’re trying to save, it’s humanity... The environment was here long before us and will be here long after us. No matter what we do, it will adapt. Even if that adaptation requires getting rid of humanity. Let’s work together towards a future that costs less money, betters our health and saves lives. The decisions you make today could make you a hero for generations to come. That’s why we decide to build Passive Houses.

Watch our house build on Periscope

My techie husband has started to Periscope from site. What does that mean? Periscope is social video streaming. You can follow him live when he's on site, listen to him explain things as he walks around the house, ask him questions and interact. The future is now.

Follow him @marktrosen. He'll probably announce the live stream on Twitter beforehand. If you're not following him on Twitter yet, get on that. He's been posting his own updates there too. AND if that's not enough, our builders Cornelis Grey have been Periscoping too. Follow them @cornelisgrey.

Mark's first broadcast on Periscope