Preliminary air test results on our Passive House

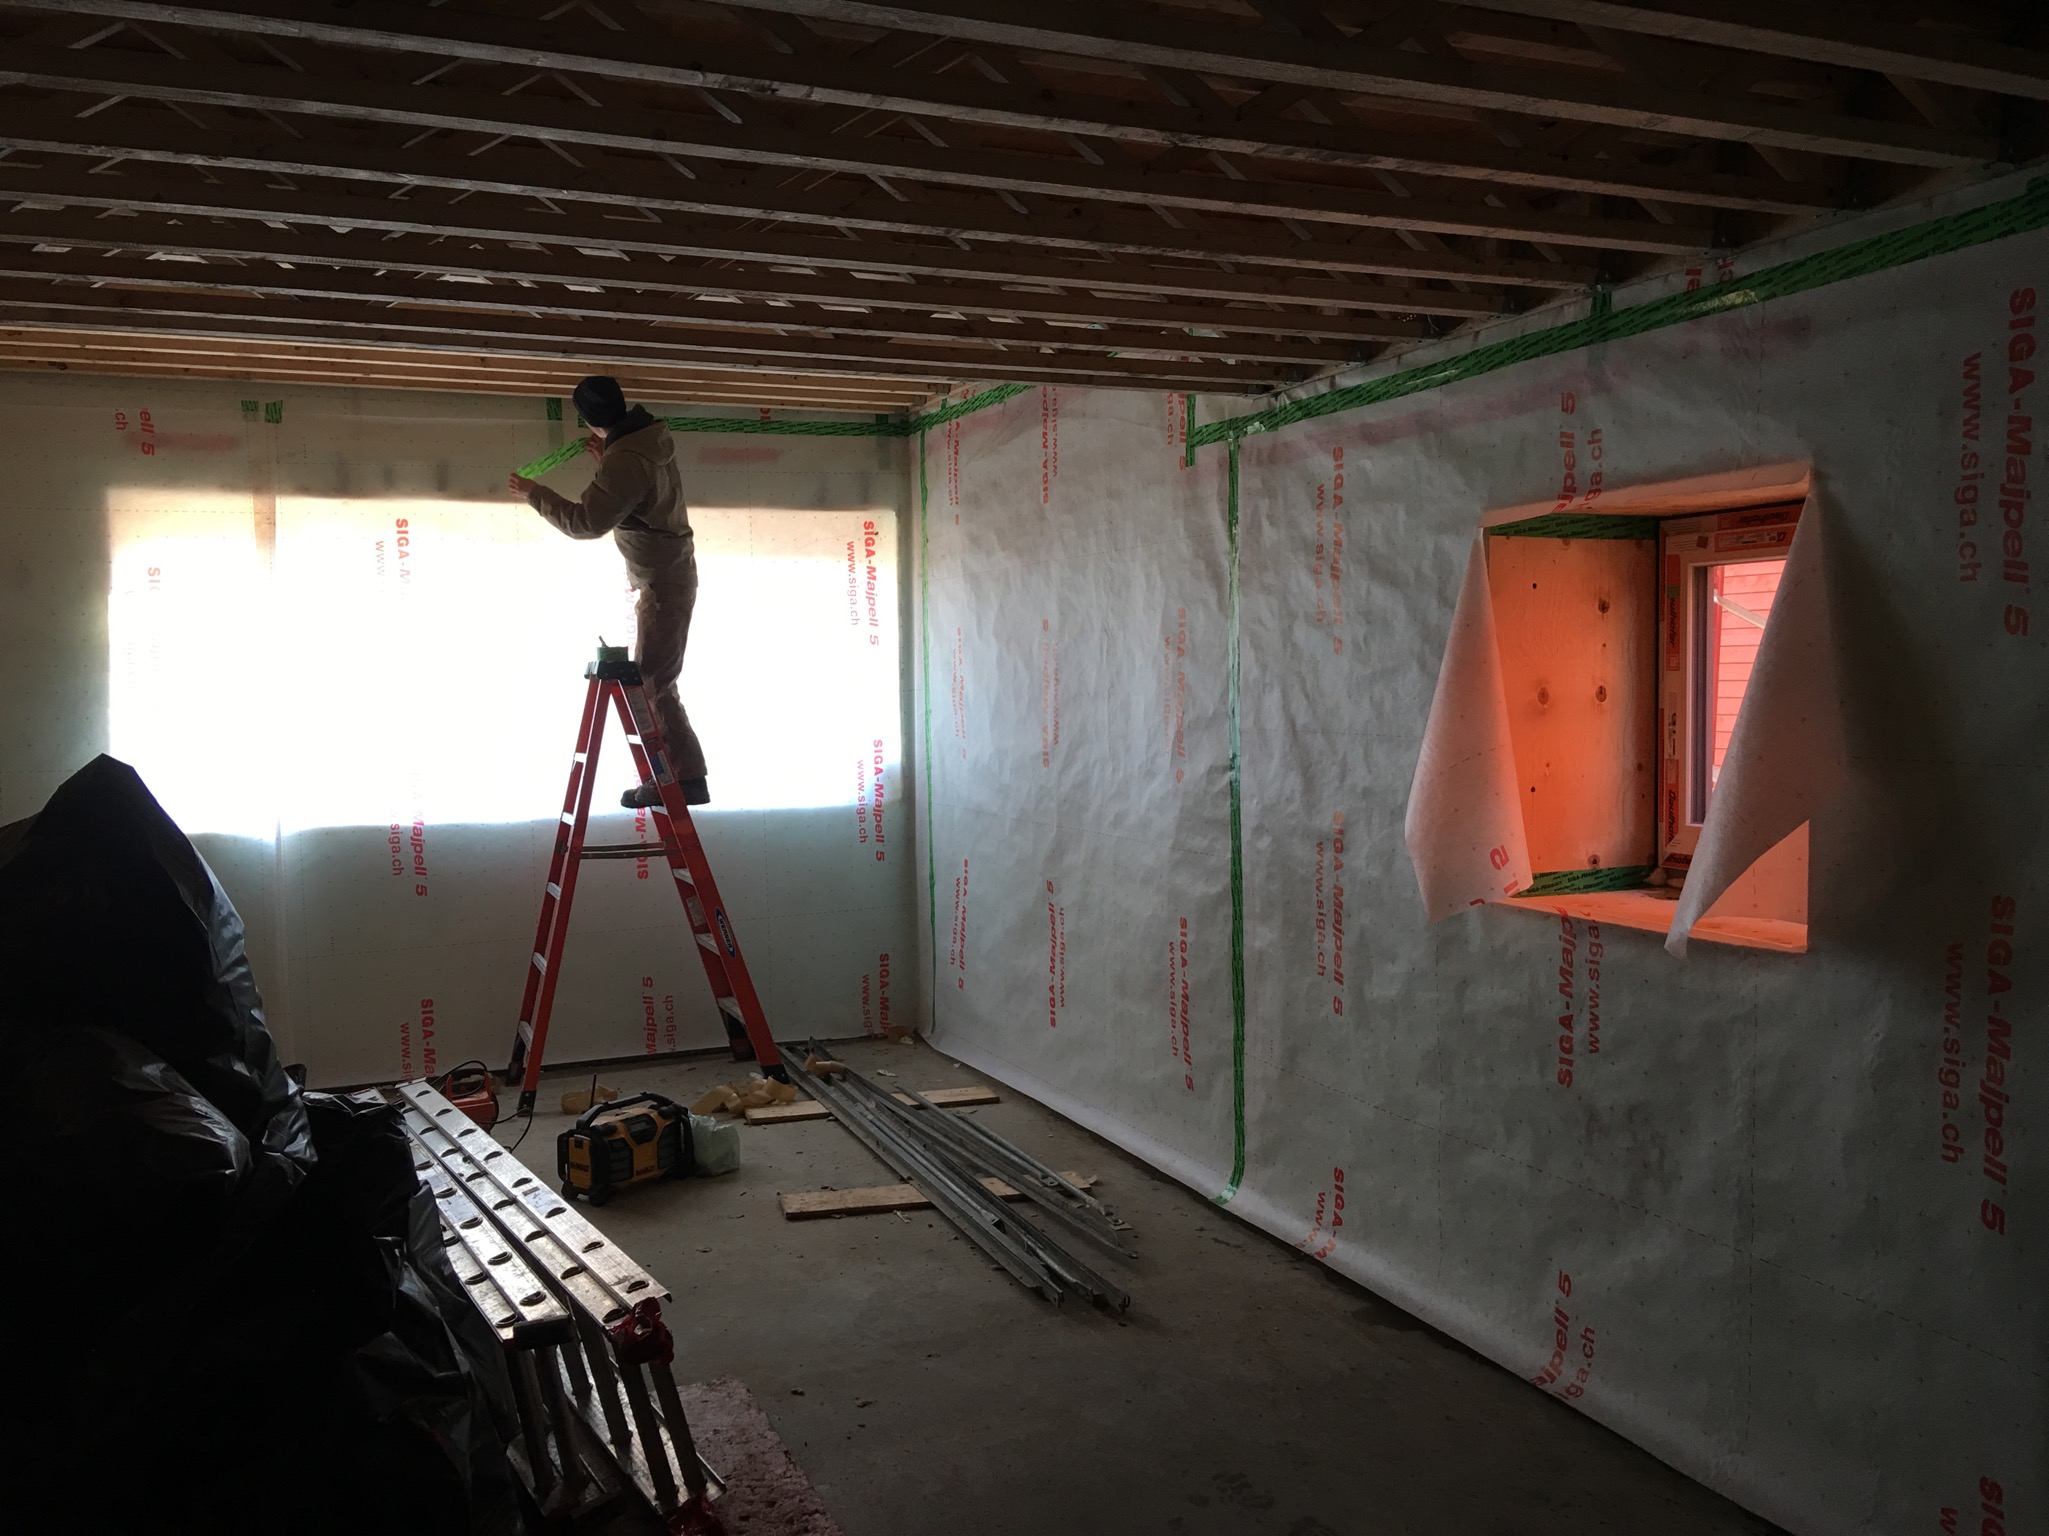
Before any of our electrical and plumbing work begins, we did a blower door test. This tests to see how air-tight our house is. The test we did was only a preliminary blower door test to ensure that our walls are on track to hit the target, even though not all of our windows and doors are completely sealed yet. We did some temporary taping in a few locations in order to perform the test. We also only performed a depressurization test this time (PassivHaus requires both a depressurization and pressurization test). This is because the temporary taping would have failed under pressurization.

The PassivHaus Standard requires an air tightness of 0.6 ACH50 or better. ACH50 stands for Air Changes per Hour at 50 Pascals of pressure, or the total number of times that the entire volume of air in the house will be exchanged through leakage at a given pressure. 50 Pascals is roughly 5 times the pressure that a house would experience on a cold winter day due to difference in temperatures between the inside and outside, so the test ensures that performance at everyday pressures will be ensured.

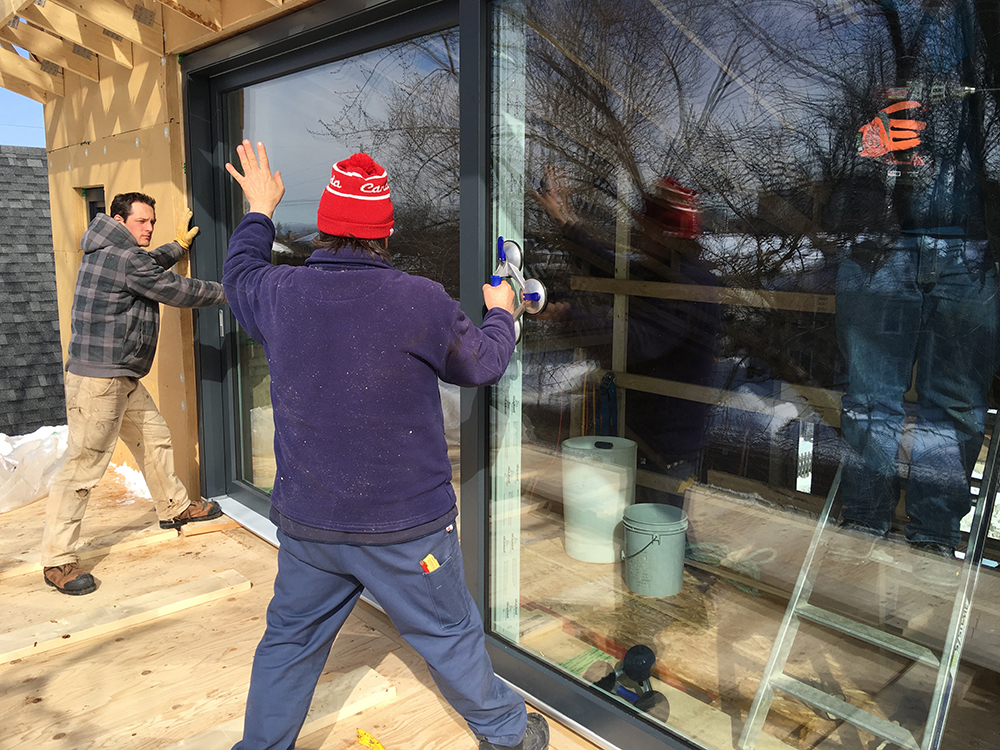
The results? We achieved 0.47 ACH50 on the first try!! We are very happy with this result. We will retest the house after the last few windows are completely installed to see how we can bring this result down even lower. The lower this number gets, the smaller and more effective our heating and ventilation system can be.

Early results predictions/friendly wagers. Here's hoping we reach Mark's 0.18 with the final.

Early results predictions/friendly wagers. Here's hoping we reach Mark's 0.18 with the final.

Construction week 29 – interior walls

Interior walls somehow make the spaces feel bigger

Interior walls somehow make the spaces feel bigger

Interior walls are complete. We are holding off on building our service cavities until Mark can perform an air test. He can’t perform the air test until the shell is completely sealed. He can’t finished sealing off the shell until he gets more tape, which he ran out of late on Friday. So...the air test will have to happen next week.

It’s important that the air test happen at this early stage because if we find gaps now, they’re easy to fix. If we wait until after we build the wall cavities, we’d have to take them apart to get at the leaks. The air test is important because the performance of our house hinges on it being of a certain value. Any amount we exceed this value, drastically improves our energy model. Our target is very aggressive, so we’re not expecting to beat it by much. But we hope so. We hope it breaks records ;)

Mark is contemplating whether or not to Periscope the air test. If you want to see it, let us know! Once we’ve run it, we’ll write another post going into a bit more detail.

What else happened last week?

  • Our flat roof was insulated. Mark spec’d a ‘dense pack’, but the installer gave us more of a ‘pillow pack’. So they had to return and fix it. Which goes to show it really helps to have a general contractor who knows what to look for. Good job Mark!
  • We installed the air vapour barrier against the basement walls, which forms part of our continuous air barrier line.
  • The plumbing vents rough-ins went in.
  • AND we settled on the lighting for our open space. It’s been a major design dilemma. And had the potential to cost muchos dineros. We got clever and are designing our own lighting system, which you shall see when it comes together in real-time. We’re very excited about ticking that one off the list.


Next week: air test!

Basement air and vapour membrane

Basement air and vapour membrane

Plumbing vents through the roof (pre-insulation)

Plumbing vents through the roof (pre-insulation)

Attic insulation (blown-in cellulose)

Attic insulation (blown-in cellulose)

Comment
Share

Construction weeks 26 & 27: windows and air barrier

gaulhofer-lift-and-slide

We have windows! The Hermann’s installed those that could be man-handled and lifted into place by hand on week one, and the remainder on week two with the help of a crane.

Getting the house sealed in and weather proofed is holding us back at this point so it feels good to have them in place. And damn they’re fine. Feels like a legit house now. It’s a thing of beauty.

The crew also finished off the wall cavity insulation and started installing the air barrier, which is a layer of OSB (oriented strand board -- comes in sheets like plywood) that gets taped at all the seams with a special Siga membrane tape.

And some photos:

Window delivery

Window delivery

Our glass

Our glass

Mark and Andreas trying to give high 5s while holding up a 2000 lb window in place

Mark and Andreas trying to give high 5s while holding up a 2000 lb window in place

The thickness of our triple-pane kitchen window. NO backyard baseball games.

The thickness of our triple-pane kitchen window. NO backyard baseball games.

Kitchen window install -- Justin and Andreas

Kitchen window install -- Justin and Andreas

Rear elevation avec les windows

Rear elevation avec les windows

Front elevation with temporary door

Front elevation with temporary door

The loft window lift-and-slide

The loft window lift-and-slide

What else of news?

There have been some headaches around getting our second construction mortgage withdraw because our unconventional build is being treated as conventional. We hope things have been ironed out, but have yet to receive the monies in our bank. This is a longer blog post for another time. Argh.

Now our shell is 95% complete. There are still a few items outstanding:

  • our attic and flat roof need insulating (blown-in cellulose)

  • some wood fibreboard is missing on the outside (because of how the walls were lifted)

  • some weather-proof taping to be done on the seams of the wood fibre board

We need to start making decisions ASAP on a lot of things. Our kitchen will need 10–12 weeks at the factory, which means we are already behind the 8-ball. Our lighting and plumbing fixtures need sorting too. We have yet to make these decisions and already decision fatigue has set in.

If I’ve made light of building a home, in any way, you have been misguided. It’s not for the weak of heart or will. One the one hand, I’m ecstatic to see our home coming together and to reach these huge milestones. One the other, there is still so much to do. It’s a massive source of stress. In some ways though, it feels like the homestretch (before the homestretch). And when I walk into our home, I am in complete awe. I love it so much, which definitely helps to ease the stress. Looking forward to ticking some key decisions off the list.


Our Passive House wall truss system explained

One of our wall sections being assembled and ready for lifting!

One of our wall sections being assembled and ready for lifting!

With the wood framed walls well underway now, I thought it was high time that I sat down to write a post about the design and theory behind the wall system we are using. When we set out to build our project, I spent a lot of time thinking about double stud wall construction. For those unfamiliar, a double stud wall is a wall made up of two seperately framed walls, one inside of the other, usually seperated by a space for insulation. The beauty of the double stud wall is that the overall thickness of the wall is very flexible: by moving the two stud walls further apart you can add insulation and increase the effective R-value of the whole assembly. The continuous insulation is also a great thermal break preventing thermal bridging through studs.

Still, there are a couple of challenges that the traditional double stud wall presents. First of all, the exterior wall is usually built first, and the interior wall much later once the house is enclosed. The main drawback of this is that the exterior wall necessarily becomes the load bearing structural wall. I'm a big fan of keeping structure as much to the inside of the thermal envelope as possible for two reasons: first, it keeps the structural elements warm and dry and protected from cycles of expansion and contraction, and second, it reduces the number of structural penetrations or complex structural details that interfere with a good air barrier.

When designing the system for our project, I set some key goals for myself. I wanted to have a system that hit all of these key points:

  • Structure to the interior

As discussed above, this is just the right place for structure to be. It also facilitates the next point below...

  • Air barrier to the interior, and as straight and uninterrupted as possible

I wanted to use OSB with taped joints for the primary air barrier. In order to keep from having a messy transition at floors, the idea was to come up with a way to run the air barrier up straight past the floors without joist cavities to contend with

  • Excellent drying potential

With all walls, and especially with high R-value walls, it is crucial that the wall has good drying potential, and that no opportunities for condensation are created within the assembly.

  • High R-value (obviously!)

This could have been the first point. Super-insulated is Passive House's alternate code name.

  • Can be insulated from the interior after framing is complete using mineral wool batts

I wanted to avoid insulation that would require scaffolding or lifts for installation, partly because of the limitations of the site, and partly for cost and labour savings. In terms of insulation type, I'm a big fan of mineral wool insulation. What's not to love? It's water resistant, mould-proof, fire-proof, high in recycled content, and has a good R-value that actually improves as it gets colder outside.

Wall section: Click to enlarge

Many hours of sketching and head scratching and I came up with the idea of creating a hybrid system. Taking some cues from Swedish platform framing, and some from the double stud wall approach, I designed a system using thermally broken wall trusses with wood fibreboard exterior insulation and 20" deep cavities for filling with Roxul. Here is how this system meets the design criteria from above:

  • Structure to the interior

The wall trusses are composed of a 2x6 stud and a 2x4 stud held together by a series of 5/8" plywood gusset plates. The 2x6 stud is the interior layer of the stud, and behaves very much like a standard 2x6 wall. The gussets support the 2x4 layer through shear resistance, and are engineered to support the siding and wood fibreboard insulation. These trusses align with the foundation below: the 2x6s bears down on the concrete, and the 2x4s are cantilevered out over the EPS foam. By building with these wall trusses, we end up with a double stud wall with an interior structural element, and the whole assembly goes together in one shot.

  • Air barrier to the interior, and as straight and uninterrupted as possible

After the walls are stood up and insulated, the interior gets clad with OSB sheathing. At the top of the walls, the floors are installed on hangers that mount to the face of the OSB and through to the floor header installed into precut notches in the 2x6 layer. The hangers will use a self-sealing nail tape during install. The result is that the OSB air barrier runs in a perfectly straight line from the foundation up to the roof (with window and door openings being the only exceptions). Easy to tape, easy to seal.

  • Excellent drying potential

The entire assembly to this point is extremely vapour open. The OSB is the most vapour resistant element so far, and it is on the warm side of all of the insulation. The mineral wool and wood fibreboard both allow water vapour to move through and dry to the exterior. This was one of the main reasons we chose to use the wood fibreboard exterior cladding over a foam material.

  • High R-value

With a 20" deep cavity and 2-5/8" of wood fibreboard on the exterior, the nominal R-value of the wall is roughly R-96!

  • Can be insulated from the interior after framing is complete using mineral wool batts

As the walls are framed, they are squared and stabilized with let-in t-braces on the exterior 2x4 layer. Coupled with temporary bracing, we are able to frame all of the exterior walls, floors, and roof prior to installing the OSB sheathing. This leaves the wall cavities open to the interior for easy installation of batt insulation. Adding the OSB after insulation is complete adds the final permanent racking strength to the house where it belongs, right against the structural framing.

We had all of the wall trusses manufactured off-site, and delivered pre-cut and labeled as a complete framing package. We have framed and lifted three wall segments so far, and although progress is slower that hoped for as we figure out the nuances, things seem to be working well! We rented a set of wall jacks to help lift the walls into place, as they are far too heavy to lift safely by hand. Here's today's timelapse showing the process.

We are starting to pick up some steam as we go. Three more sections to go on the main floor and we will be almost ready to install the second floor deck. It is really exciting to watch as the rooms of our home take shape!

There are many other details and considerations that went into this and all of the other construction methods being used in the house, so I welcome any questions or comments!