Construction week 51: the final countdown
The one week (less than!) countdown begins. Our official move day is Friday, September 2nd. My daughter's 4th bday. Sure to be a memorable one.
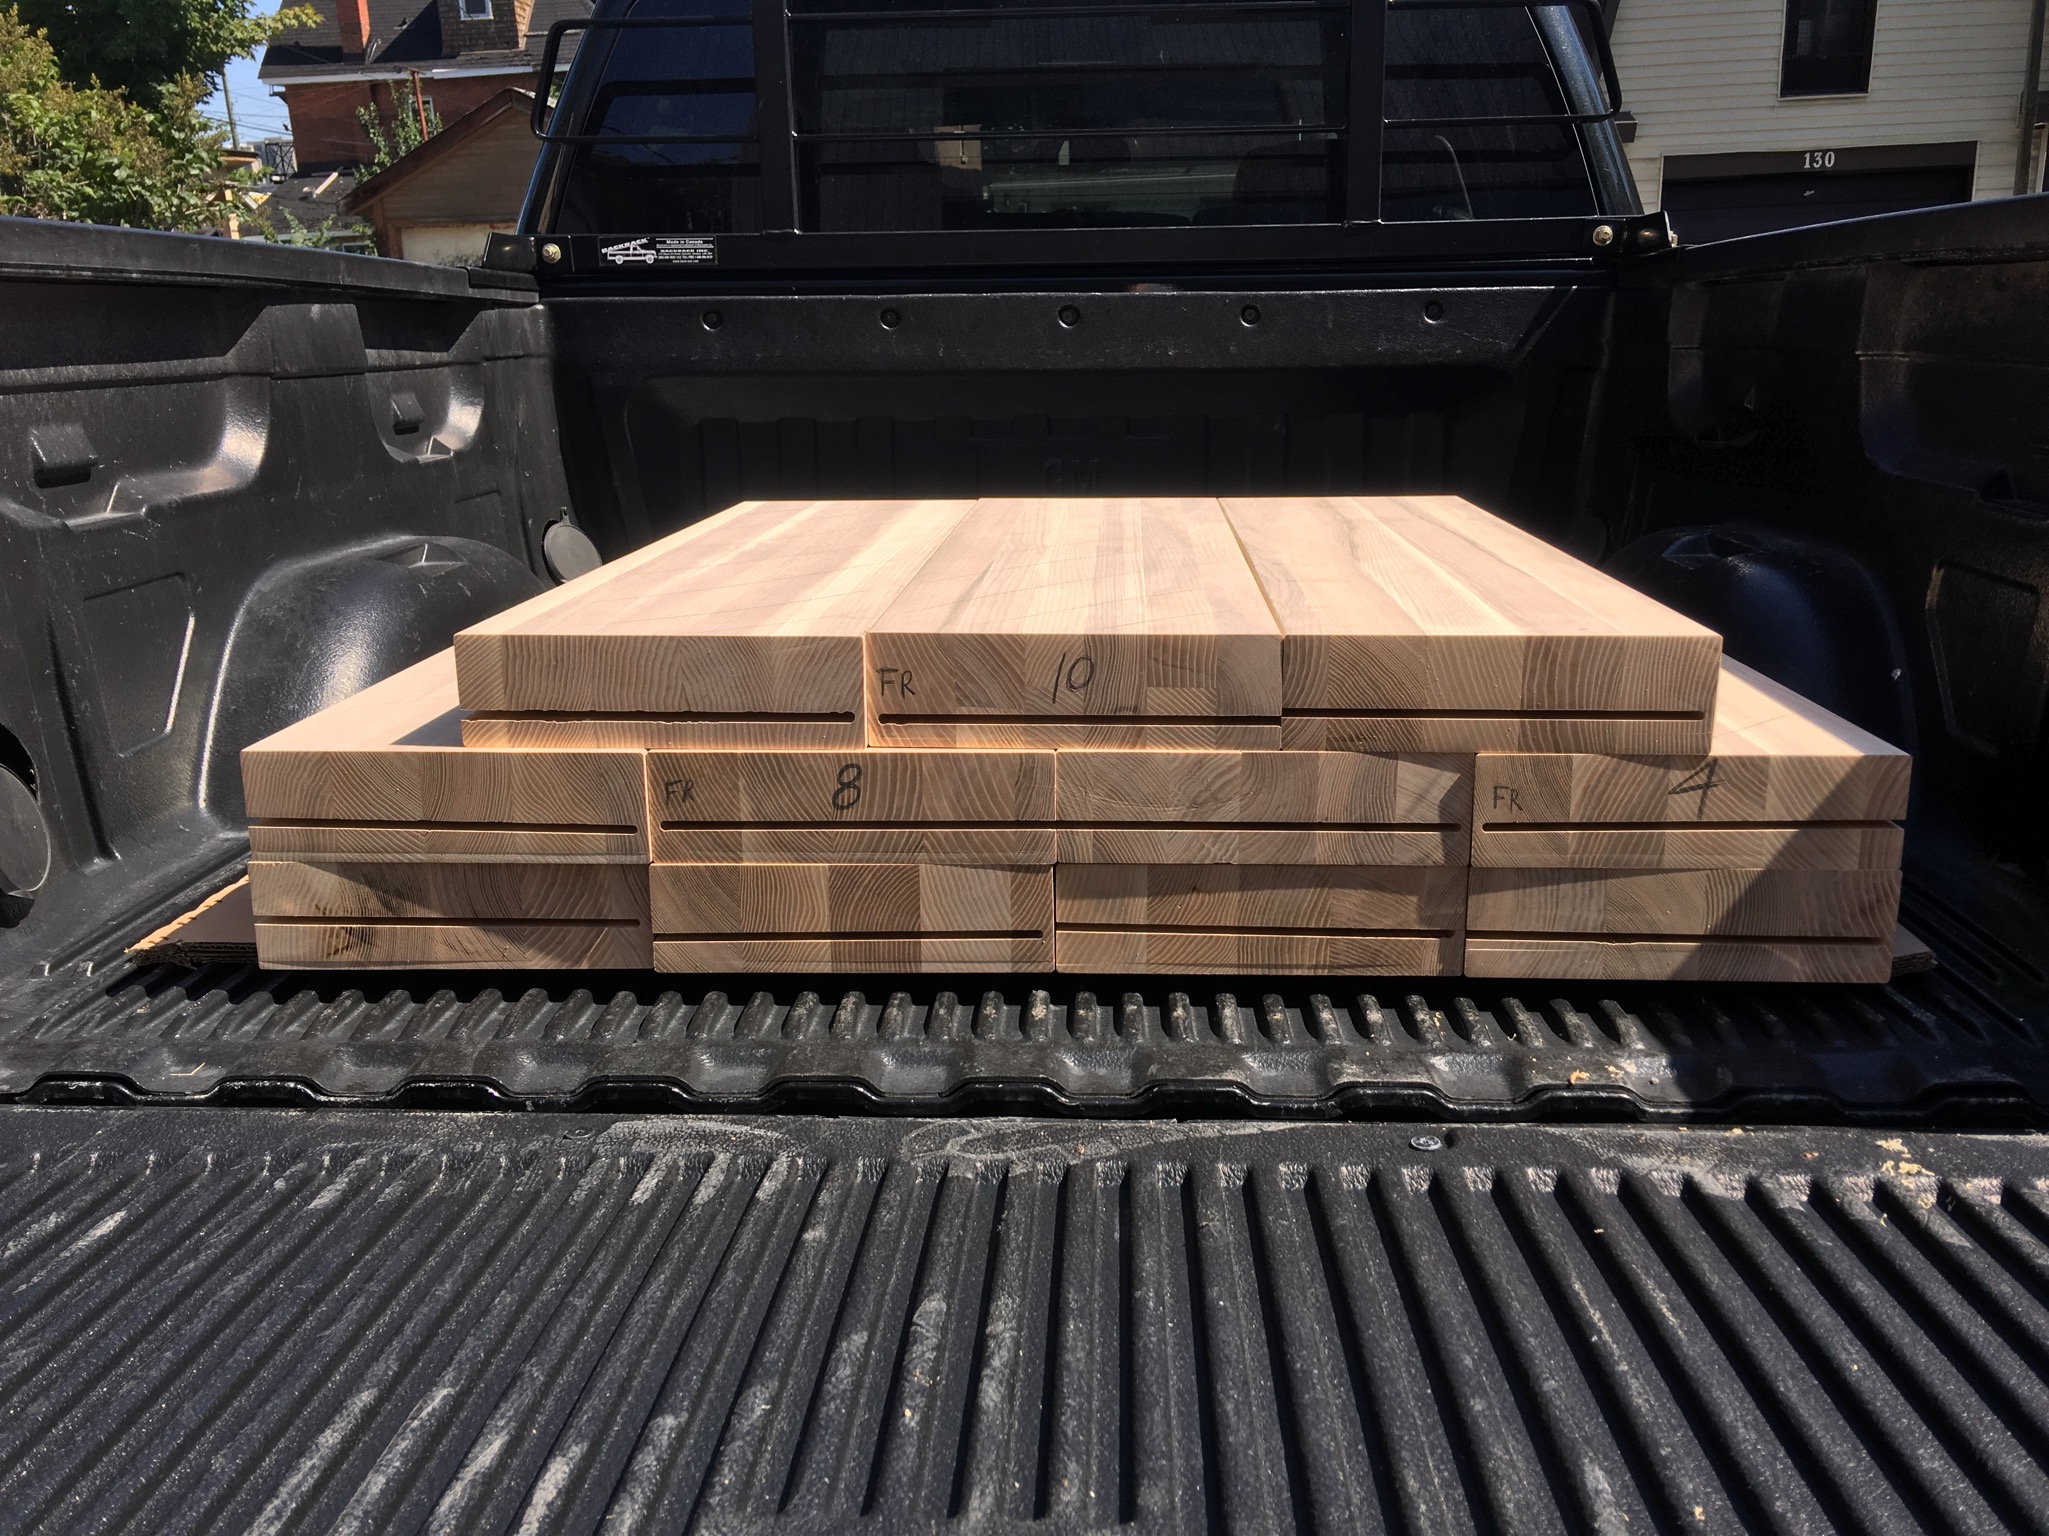
Our ceilings aren’t the only destination for wood in our house. Wood on the outside, wood on the inside. I’m starting to think of our house as the ‘wood box’: where a simple, honest shape meets a simple, honest material. Anyways, this week was focused on floors and stairs. Both receiving the full white ash treatment.
Stairs
Our super-awesome-carpenter-guy Graham was tackling stairs. The stairs are three inch thick slabs of white ash (from the Wood Source). They have been designed to be supported by the stair metal brackets Mark had made and installed. The wood requires a small channel carved into its ends, so it can slide onto the bracket, sandwiching it, and hiding it so that the wood ‘floats’.
And this is where I segue over to Graham praise. He goes above and beyond. We are incredibly lucky to have him on our project. He possesses the same passion and care for quality and craftsmanship as does Mark. For instance, in order to carve our stair channels, he needed a better tool for the job, a Festool. He couldn’t find one in Ottawa, so he drove to Kingston to purchase it (hour and a half drive), drove back, and took a lesson on how to properly use it that same night. He was on site the next day figuring our how to precisely carve these channels at varying subtle angles, in order to get them just right. And he did. He also makes a great DJ. No Chez 106 on our site.
The only stair hiccup was a small mistake made by Mark with measurements. One floor riser was ⅜” taller than others, which apparently isn’t ‘to code’. I’d bet none would be the wiser if we kept the ⅜” difference, but to the uncompromising Mark Rosen, this surely wouldn’t do. So we had all the stairs planed down ¼” so that each step is now at 100% equal height. Unfortunately, we had to bring them back to the Wood Source to get them done. So all the work on the stairs won’t pay off until early next week and the temporary stairs had to get reinstalled. Wah-wah.

Stairs go in
Stairs come out
Floors
Drumroll…
No squeaks! Rejoice rejoice!
A full glue down was the trick for our 5” white ash, site finished hardwood. We used two different polyurethane flooring glue because the local supplier, Dragona, didn’t have enough in stock to do all in one brand. We used both Maipei ultrabond eco 995, and Roberts 1540. We also stapled, but only when necessary to keep the boards toight.
Mark, Graham and Sebastian have been working on the floors, burning the midnight oil. Working until midnight the last three nights in a row. We rented some machines to sand the floors down ourselves too. We were going to hire out the finishing job, but we’d have to wait until Wednesday to do so. And with our September 1st move-in coming up, we just couldn’t.
Everyone unanimously vows, repeatedly, that this would be their first and last glue-down hardwood floor + finishing install. The glue was the worst. Thankfully, they are also in unison upon the fact that they look bloody fantastic.


Oiling the floors happens this week.
Appliances
With the exception of our laundry machines (because the wood floor has to come first), all our appliances have been installed! So what appliances did we choose for our Passive House build? I’ll write a separate post on this. For now, just know they are in. Mark was boiling water every 10 minutes, and timing it, on our new induction cooktop. He even took video to show me, on the first night in was installed, and now I’m posting it here for everyone to see. It's just about the least exciting 4 minutes of your life, but not for Mark. lol.

Our downdraft ductwork. Yowzers!
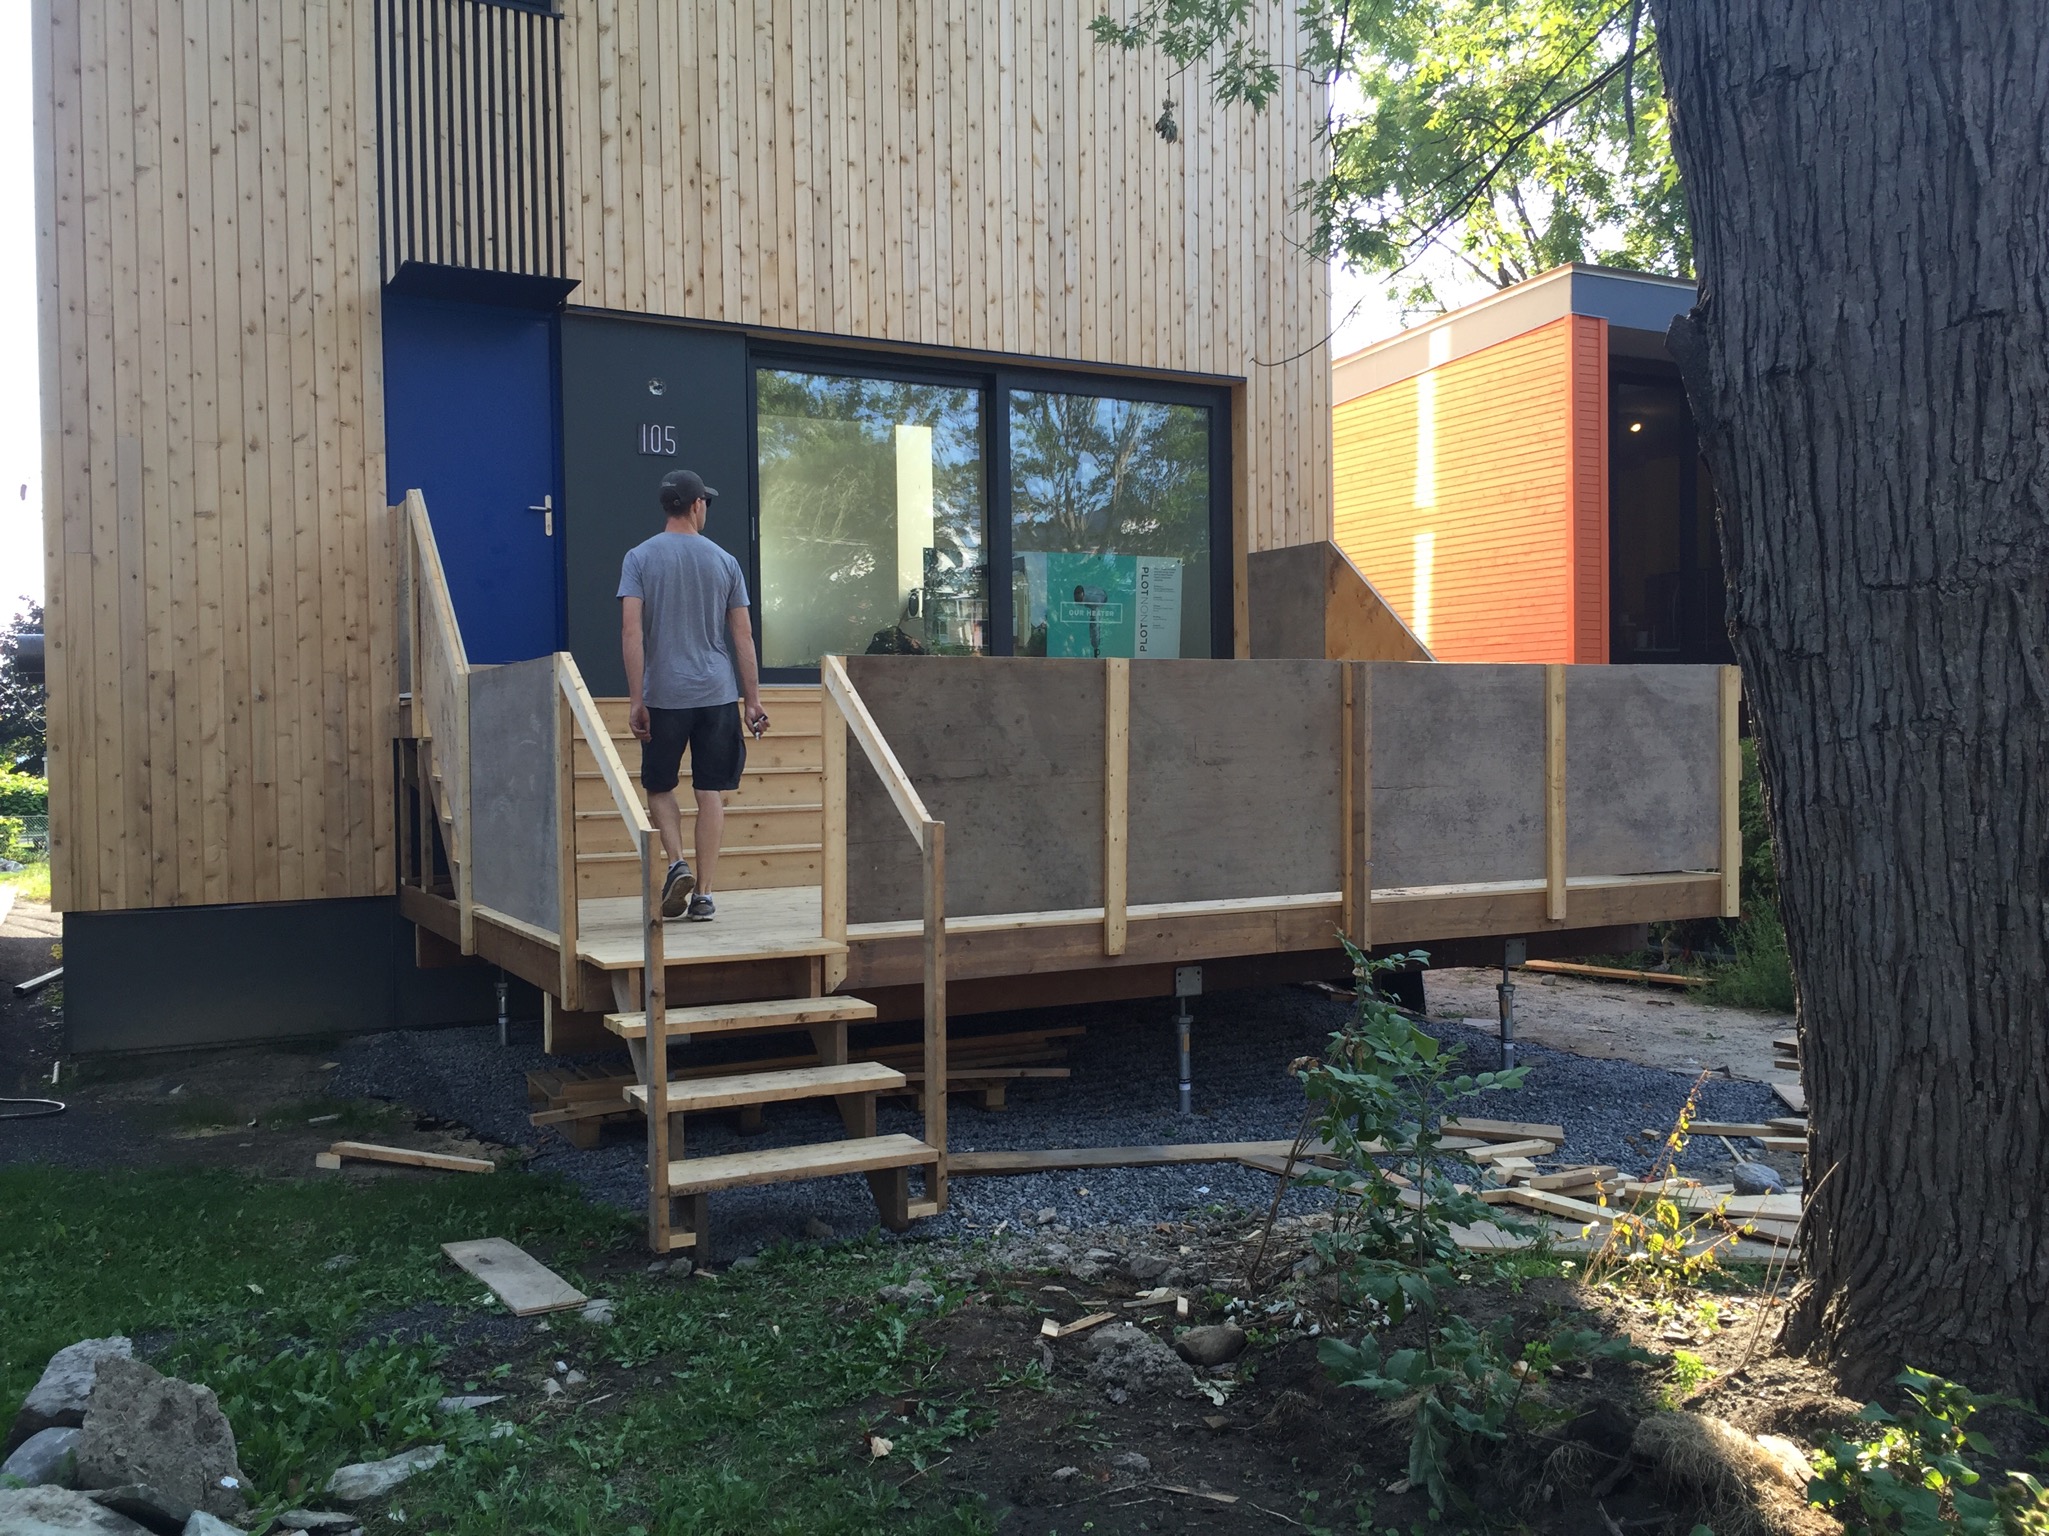
Temporary railings
We had to install some temporary railings to get occupancy. Must admit, we cried a little on the inside putting the hideous, weathered plywood up on our mostly finished house. But at least it’s safe and will get us to permit. It should only be a few weeks of us living with them in this state until the permanent railings are ordered and installed.
It hurts!
Yard cleanup
I wish I had thought of Kijiji earlier on in the build. I used it to get rid of all our extra building material. And it was so easy! People will take anything. Especially if you say it’s free. It would have saved us a whole dumpster of waste, at least. Lesson learned. Now that most of the extra building material is off the lawn, it’s starting to feel like a proper house (our landscaping is on hold, so it’s a massive weed garden, but it’s better than a building supply lot).
Plumbing
Toilets, faucets, showers, bathtubs, drains, heat exchanger connections, floor drains, condensation traps, backflow valves. We’re ready to pass our plumbing final inspection, which will take place on Monday. Our diswasher and espresso machine still need to be hooked up, but aren’t required for occupancy. I’d like to take a moment to admire Nathan’s skills. Our mechanical room is a work of art. Look at all the cool copper handiwork. It really adds to the engine room feeling of the house. Of all the beautiful spaces in our house, it might just be Mark’s fave :)

Check out our sweet stack
Occupancy
And finally, our occupancy. We called for the city to come on Tuesday. Usually they are required to come within 24 hours of a request. But for some reason, they were overbooked, and we couldn’t get anyone out this week. So someone should be coming on Monday. We were really hoping for someone to come on Friday, to give us an idea on what our weekend ‘occupancy to-do’ list would but unfortunately, no dice.
Move
Meanwhile, while Mark’s working on site into the late hours, I’m at home packing boxes. I pulled the trigger and managed to find a moving company less than a week in advance of the move date. The thought of moving all the boxes and furniture ourselves, with all the work remaining at the house and all the work to date, was enough to shatter me into a million pieces. Phew! When my mom was visiting last week, she was with her Australian boyfriend, who trained with their military once-upon-a-time. He expressed concern that we were starting to show signs of severe exhaustion akin to his military training where they push you until you break, and then keep pushing. Maybe. But at least we have our new spa to unwind in at the end of the long day :)

Ahhhhhhh