Our Passive House HRV/heat exchanger system

Part 1 of a video series with Mark casually explaining our mechanical systems as we sit on the couch. There will be three videos following along later this week, going deeper into our mechanical systems. All of which stemmed from my earlier post on appliances.

Comment
Share

Construction week 20: 3rd floor framing

There's snow in the house. We always liked the idea of bringing the outside - in. But this is taking it too far. Wah-wah.

There's snow in the house. We always liked the idea of bringing the outside - in. But this is taking it too far. Wah-wah.

Our second floor (third if you include the walk-out basement) has been framed in. The cold temps have definitely come with challenges. We're using an adhesive on the edges of the wood fibre board that needs to be warm to be malleable. So we've rented space heaters to keep a small section of the basement warm for the adhesives. And there's snow on everything.

It's so bloody cold. Went out there for half an hour last week and my toes almost fell off. Props to construction workers in this city. It's unreal. And then I go sit in my cushy, warm office job, feeling slightly unworthy. Respect.

We took some friends on a tour of the house this past weekend. They had their children with them. The five year old said, "Mina's house looks like Elsa's* castle because it's tall and there was snow inside".

* For those of you who don't have a child, Elsa is a snow queen from Disney's film Frozen.

The third floor joists should be going in this week. In the meantime, Mark and I are trying to work out some design details for the inside, of which there are many. He's working on our kitchen & bath layouts so we can get them priced out to make decisions. We're agreeing on all the big picture items, so hopefully that bodes well for when we have to start selecting finishes.

He's also working on our HRV design. Where the fresh air and exhaust vents will be located. It's fascinating stuff. I'm working on a post with fancy visuals to help illustrate the concepts. I'm also doing a bit of research in to automated home technologies – ways to make the house smart. If anyone has any knowledge in this, please share! Just because the house is low-tech (crudely-speaking), doesn't mean other areas of the house have to be. Lights that learn? Maybe.

Dwindling winter daylight. Pano of the second floor.

Dwindling winter daylight. Pano of the second floor.

Rear elevation.

Rear elevation.

Views of the city beyond the tree and rooftops.

Views of the city beyond the tree and rooftops.

Construction week 14: first floor framing complete

The sun sets over another week. 

The sun sets over another week. 

The last two walls went up this Monday. Here is a Periscope from the weekend with a special guest star appearance. Teaser: it was me. We put the final touches on the walls together. 

We are counting our blessings lately for all this "warm" weather. 

Comment
Share

Foundation Construction Details

Slab and foundation/basement walls with insulation and frost skirt

With the slab poured and the ICF well under way, I thought I would write a quick post with visuals explaining the construction methods and materials being used. I've created some images to go along with all the photos we've been posting to hopefully add some clarity to what you've been looking at so far!

The images above and below show the concrete foundation and foam insulation as it will be once completed. The image below has labels calling out the various layers. 

Components of the foundation

The biggest difference between our foundation and a typical residential foundation is the lack of concrete footings.  A typical foundation would pour strip concrete footings right onto undisturbed soil, then pour the concrete walls, and finally pour the slab inside the walls. In our home, the slab is poured before the walls and will actually support them, which is why it is so much thicker (8" instead of the standard 4") and has so much steel rebar in it. It is also completely contained within the foam insulation tray, eliminating any thermal bridging through the concrete to the ground. The end result of this is a concrete floor that will retain the heat it absorbs from the house above, rather than simply dumping it through into the ground. 

The walls on top of the slab are made up of three layers. First is the ICF (insulated concrete forms) from Nudura. These are like Lego for grow ups. They snap together to form the walls and are held apart by integrated webbing. The cavity is 6" wide and on Friday we will be pouring it full of concrete. Watch for photos this week showing the alignment system that will ensure the walls are straight and true as the concrete is poured. 

Once the concrete is poured and the walls straightened, we will be adding two more layers of foam from Styrorail to the exterior to build up the insulation value of the walls. The first layer has horizontal wood strapping embedded, and the second layer will cover this wood and effectively embed it in the middle of the wall. The foam will be glued in place using PL 300 glue, which is specifically formulated not to deteriorate the foam over time. The horizontal wood strapping gives us something to tie back into when we go to install our siding above grade. 

The slab poured and the first layer of ICF in place. 

Now let's talk about the big white elephant in the room: why so much foam? The amount of insulation is one of the trade offs required to achieve passive house performance on such a challenging site. Because of the limitations of orientation and south-facing window areas, we have to compensate by beefing up the thermal envelope more aggressively than you might find in other passive house projects. The final thickness was determined after several rounds of refinement of the energy model (using PHPP for those keeping track). The really nice thing about this configuration is that all of the concrete is on the warm side of the thermal envelope, where it will hold its warmth, and is protected from expansion and contraction. This alignment becomes especially important when we get to the design of the framed walls above...more on that soon. 

ICF at the end of 1 day's work.  

ICF at the end of 1 day's work.  

Construction week 8: the slab

passive-house-forms
passive-house-slab

Work started this week with more rebar — the critical metal mesh which reinforces our structural concrete slab. Once the metal work was complete, our structural engineer, Peter Campbell, came by to inspect and sign-off on it. Check and check. We were ready for concrete.

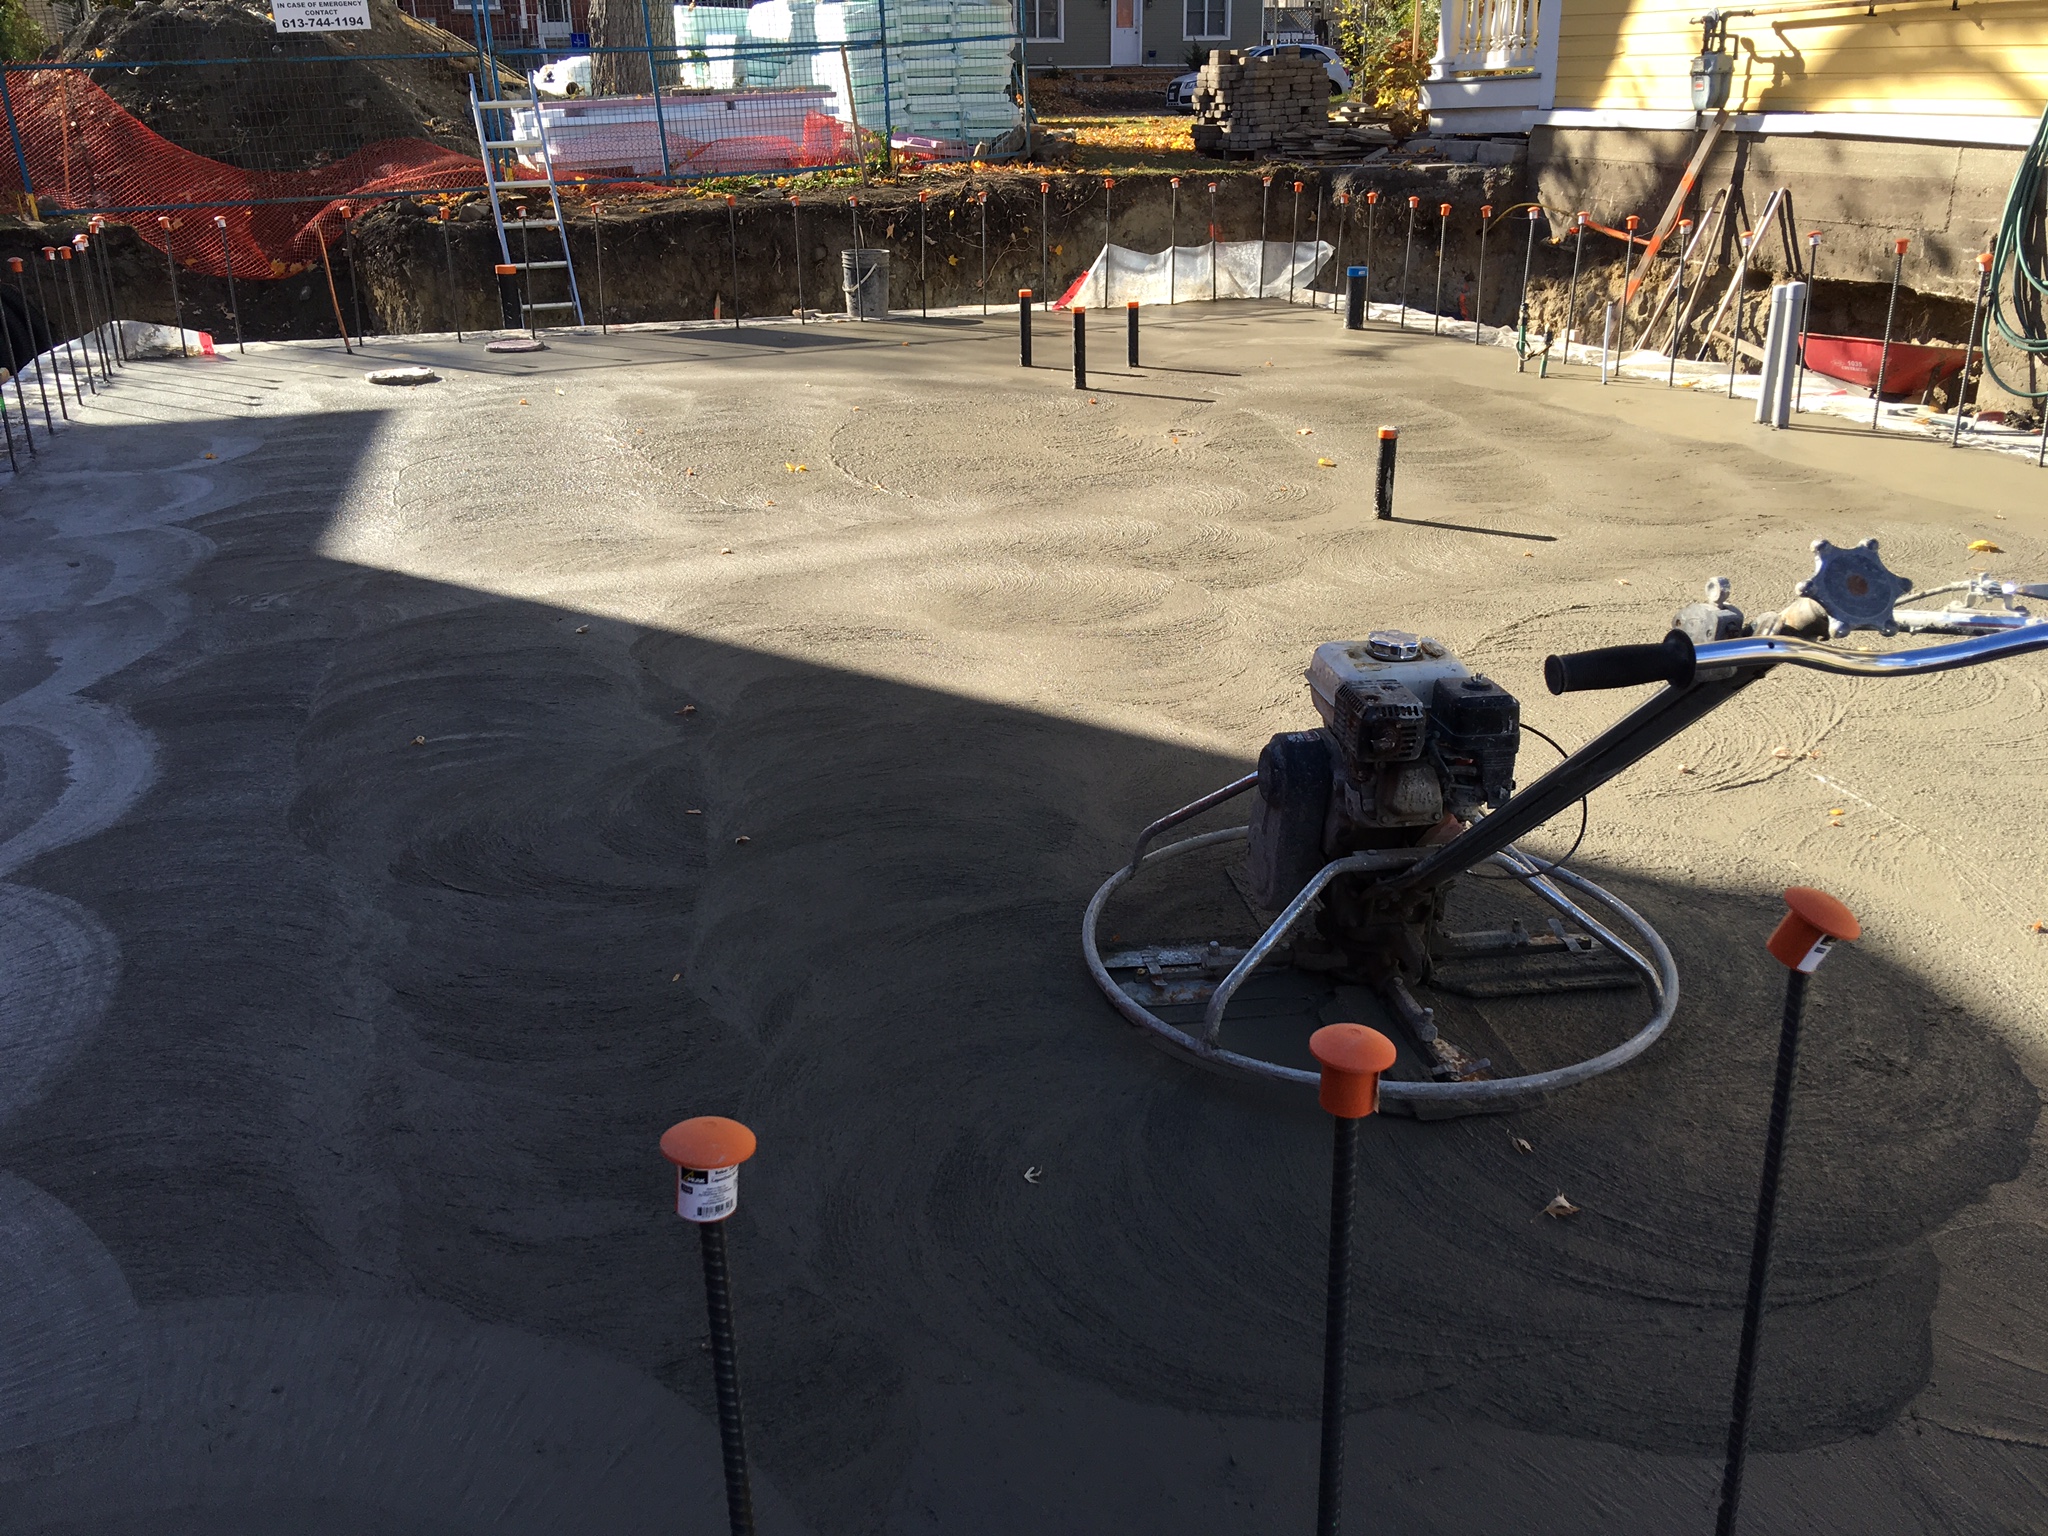
I am relieved to say that the concrete pour went really well. The team was great and the slab looks great. But this step did not want to happen. First of all, concrete is surprisingly expensive. We had a hard time assembling quotes. Ended up having our guys at Cornelis Grey tie and prepare the metal, ordering our concrete from one company, and a concrete pump truck from another company. A lot of extra coordination. And then on the day before the pour, our concrete team tried to cancel on us! Fortunately for us, Mark can be very persuasive and eventually it all worked out. Once underway, they had to pause work several times to clear leaves off the wet concrete, but otherwise all good.

On Friday, our Cornelis Grey team started installing the ICF forms for our basement walls. This work will spill over to next. And today we ventured out to the Herrmann's. We ordered our Gaulhofer windows and doors through them and they have been sitting in their immaculate warehouses for a couple months now. We finally found the time to visit them. Boy are they spectacular. And those blue doors! Swoon. They will be a joy to operate every day. Really looking forward to getting those installed. We’re still hoping to be closed in before Christmas.

This was a big week. We have a fab slab. Now it’s onwards and upwards — with walls! Speaking of those walls, I think it’s high time I get Mark to post a little something about them. There aren’t enough hours in the day. 

And some more pics from the week:

Concrete pour -- hand troweling near the wall rebar

Concrete pour -- hand troweling near the wall rebar

Machine leveling

Machine leveling

Site inspection

Site inspection

Our big blue door!

Our big blue door!

Comment
Share

Construction weeks 6 & 7

structural-slab-passivehouse

I’ve fallen behind on my blogging over the past couple weeks as I’ve started a new full-time job. Which means Mark is handling almost all aspects of the build and I’m playing catch-up over my evenings and visiting the job site on weekends. Thank goodness Mark’s more than capable and is starting to roll up his sleeves on the blog-front too. This is good for all of us, because he’ll be much better at explaining many of the build aspects than moi.

Weeks 6 and 7 were laying the foam for the tray — our structural slab. Read Mark’s post on this, if you haven’t already. Towards the end of the week our team at Cornelis Grey started tying rebar for the slab, on which the concrete will be poured. Hopefully they’ll be finished this laborious task by Monday and we can get the concrete going as soon as possible next week. They have around 1,500 ties to complete, all manually.  They’ll probably never want to see rebar ever again in their lives after this…

structural-slab-rebar
Comment
Share

Soil bearing capacity test

passive-house-ottawa-soil-bearing-capacity.jpg

I was expecting something more high-tech — maybe a glass box that would be filled with soil and mechanically compressed and measured for PSI. Nope. The engineer went into the hole with a hammer, scraped it in a few places, touched some dirt and said ‘yep, good to go!’. We have a report stating our dirt is comprised of glacial till, silty gravel with clay, cobbles at a bearing capacity of 100 kPa. I guess he just knows. Who knew?

Comment
Share