2nd floor takes shape

Joists and hangers and LVLs galore

Joists and hangers and LVLs galore

The joists and beams for the second floor are in! Today we start installing subfloor and railings. It's really exciting to see the views taking shape as we get higher!

This is the open space over the dining room, and the start of our tall south window

This is the open space over the dining room, and the start of our tall south window

Getting closer and closer to the canopy of our silver maple! 

Getting closer and closer to the canopy of our silver maple! 

Comment
Share

Foundation Construction Details

Slab and foundation/basement walls with insulation and frost skirt

With the slab poured and the ICF well under way, I thought I would write a quick post with visuals explaining the construction methods and materials being used. I've created some images to go along with all the photos we've been posting to hopefully add some clarity to what you've been looking at so far!

The images above and below show the concrete foundation and foam insulation as it will be once completed. The image below has labels calling out the various layers. 

Components of the foundation

The biggest difference between our foundation and a typical residential foundation is the lack of concrete footings.  A typical foundation would pour strip concrete footings right onto undisturbed soil, then pour the concrete walls, and finally pour the slab inside the walls. In our home, the slab is poured before the walls and will actually support them, which is why it is so much thicker (8" instead of the standard 4") and has so much steel rebar in it. It is also completely contained within the foam insulation tray, eliminating any thermal bridging through the concrete to the ground. The end result of this is a concrete floor that will retain the heat it absorbs from the house above, rather than simply dumping it through into the ground. 

The walls on top of the slab are made up of three layers. First is the ICF (insulated concrete forms) from Nudura. These are like Lego for grow ups. They snap together to form the walls and are held apart by integrated webbing. The cavity is 6" wide and on Friday we will be pouring it full of concrete. Watch for photos this week showing the alignment system that will ensure the walls are straight and true as the concrete is poured. 

Once the concrete is poured and the walls straightened, we will be adding two more layers of foam from Styrorail to the exterior to build up the insulation value of the walls. The first layer has horizontal wood strapping embedded, and the second layer will cover this wood and effectively embed it in the middle of the wall. The foam will be glued in place using PL 300 glue, which is specifically formulated not to deteriorate the foam over time. The horizontal wood strapping gives us something to tie back into when we go to install our siding above grade. 

The slab poured and the first layer of ICF in place. 

Now let's talk about the big white elephant in the room: why so much foam? The amount of insulation is one of the trade offs required to achieve passive house performance on such a challenging site. Because of the limitations of orientation and south-facing window areas, we have to compensate by beefing up the thermal envelope more aggressively than you might find in other passive house projects. The final thickness was determined after several rounds of refinement of the energy model (using PHPP for those keeping track). The really nice thing about this configuration is that all of the concrete is on the warm side of the thermal envelope, where it will hold its warmth, and is protected from expansion and contraction. This alignment becomes especially important when we get to the design of the framed walls above...more on that soon. 

ICF at the end of 1 day's work.  

ICF at the end of 1 day's work.  

Ground Source Geo-Loop

Today felt like the first day of actual construction! After a lot of delay, digging, waiting and watching, today marked the first time I actually put on my boots and climbed down into the hole in the ground to start building our passive house. The first step: installing the ground source loop.

The ground source loop is 600 feet of high density polyethylene pipe installed in a continous loop 18" below our insulated foundation. The loop will eventually be filled with a brine or glycol solution and connected to a heat exchanger in our mechanical room. A small pump in the heat exchanger will move the liquid around the loop, picking up free heat from the ground in winter and free coolth in summer and using it to temper the incoming fresh air in our ventilation system. This gives us all sorts of wonderful benefits:

  • the HRV's efficiency will be maximized in even the coldest winters
  • no defrost cycle will be required to protect the HRV's core, as the ground source heat will provide enough pre-heat
  • the incoming air in the summer will be cooled and dehumidifed
  • the size of post-heater for adding the balance of the required heat for the house is minimized

In plainer terms, the ground loop makes heating easier in winter and cooling easier in summer!

The pipe we used is from GeoSmart Energy. It was quite easy to work with, even with the cooler air temperatures this morning. We ran the loops with roughly 2 foot spacing between them. Given the opportunity, an ideal install would likely use greater spacing and a deeper installed depth — to counter this we've installed more length than is propbably required. The spacing and depth are determined in part by the constrictions of our infill site, the size of our footprint, and cost. Going deeper is expensive (not only the digging, but the fill to bring the level back up for the foundation). The original design called for installation 36" below the foundation insulation, but by reducing this to 18" we saved over $4000 in compacted fill and labour. Definitely the right call.

We will be connecting the loop to the Zehnder ComfoFond, which plays very nicely with the ComfoAir 350 we have planned. The two units have been designed to communicate and work together well. I'm happy to stick with one manufacturer for all of the pieces of this heat exchange/ventilation system, which definitely has it's perks when it comes to maintenance and warranty.

I'm looking forward to connecting and filling the loop, but that will have to wait until the mechanical system is installled (which is still months away). Once we do, we will be able to play with the flow rates through the loop to optimize the amount of energy we are able to pull from the ground.

Next up we will be installing the engineered fill and all of the sub-slab plumbing and electrical. We are also looking forward to our first big shipment of insulation from StyroRail on Wednesday!

Soil bearing capacity test

passive-house-ottawa-soil-bearing-capacity.jpg

I was expecting something more high-tech — maybe a glass box that would be filled with soil and mechanically compressed and measured for PSI. Nope. The engineer went into the hole with a hammer, scraped it in a few places, touched some dirt and said ‘yep, good to go!’. We have a report stating our dirt is comprised of glacial till, silty gravel with clay, cobbles at a bearing capacity of 100 kPa. I guess he just knows. Who knew?

Comment
Share

Construction week 1

It’s been a whirlwind couple of days. My mind has to catch up with all that has transpired since receiving our permit. Without a moments rest we have:

  1. Made copies of our building permit
  2. Made copies of permit drawing set
  3. Applied with the city for a road-cut permit (to connect to water & sewage (no gas))
  4. Contacted our surveyor and had them stake out the corners of the house so that the excavator can come in and know where to dig
  5. Contacted our excavator with the news that it’s GO time. They will start the dig on Tuesday!!!
  6. Set up a start-up meeting for early next week with some of our key contractors. Our project is unorthodox, we want to make sure we can answer as many questions and ask as many questions up front as possible. Included will be our main carpenter crew, plumber, electrician and our excavator (I think?).
  7. Contacted our city building inspector who will be giving us an inspection schedule (at what stages of the build he will need to come out and inspect). And we’ve requested a meeting with him upfront so he can familiarize himself with the project (again, it’s unorthodox and he’ll likely see things in our house for the first time)
  8. Set up Builders Risk Insurance. Trades that come to our site still need to provide us with copies of their own insurance. Since we are GC’ing this ourselves, we need an additional layer of insurance.
  9. Filed a notice of project with the Ministry of Labour
  10. Gathered material cost estimates for the foundation and ground-source heat loop — concrete, gravel, re-bar and insulated forms.
  11. Ordered a porta-pottie to the site.
  12. Ordered job fencing to the site
  13. Ordered a waste bin and storage pod

Mark’s continuing to work away at our construction drawing set. I am convinced they will be THE most detailed drawing sets an architect has ever produced. He hopes to discover and solve most of our house’s potential problems on paper, on his time and dime, rather than on site, halfway through the build…

Did you catch the part where we start excavating on Tuesday??!! In the meantime, we’re taking the opportunity to unplug and unwind with friends and family in Algonquin Park. 

Startup meeting

Startup meeting

Comment
Share

Banner cutting: work begins

I am proud to announce that work has begun! I've been waiting a long time to be able to say that. I'm feeling pretty good today. Our top-notch tree team, Ottawa Tree Surgeons, cleared the lot this morning. Quelle difference! I cannot believe how gigantic our silver maple looks now. And the lot!

Mark met our tree team and our excavators yesterday morning on the lot. The excavators are on-deck, so we wanted to ensure expectations were clear and the lot would be ready for them. Before they begin their work, we need to fence off a drip-zone around the silver maple — an orange fence that will remain for the duration of the build to protect the root zone of the tree.

Our city plans examiner took five days to respond to Mark's feedback only to say she needs a hardcopy and has since left on vacation. Argh. She'll be back tomorrow. And we're hoping the can turn around a permit for us right away so the dig can start next week. Wouldn't that be nice? Want to keep this momentum moving forwards. 

April turns to May

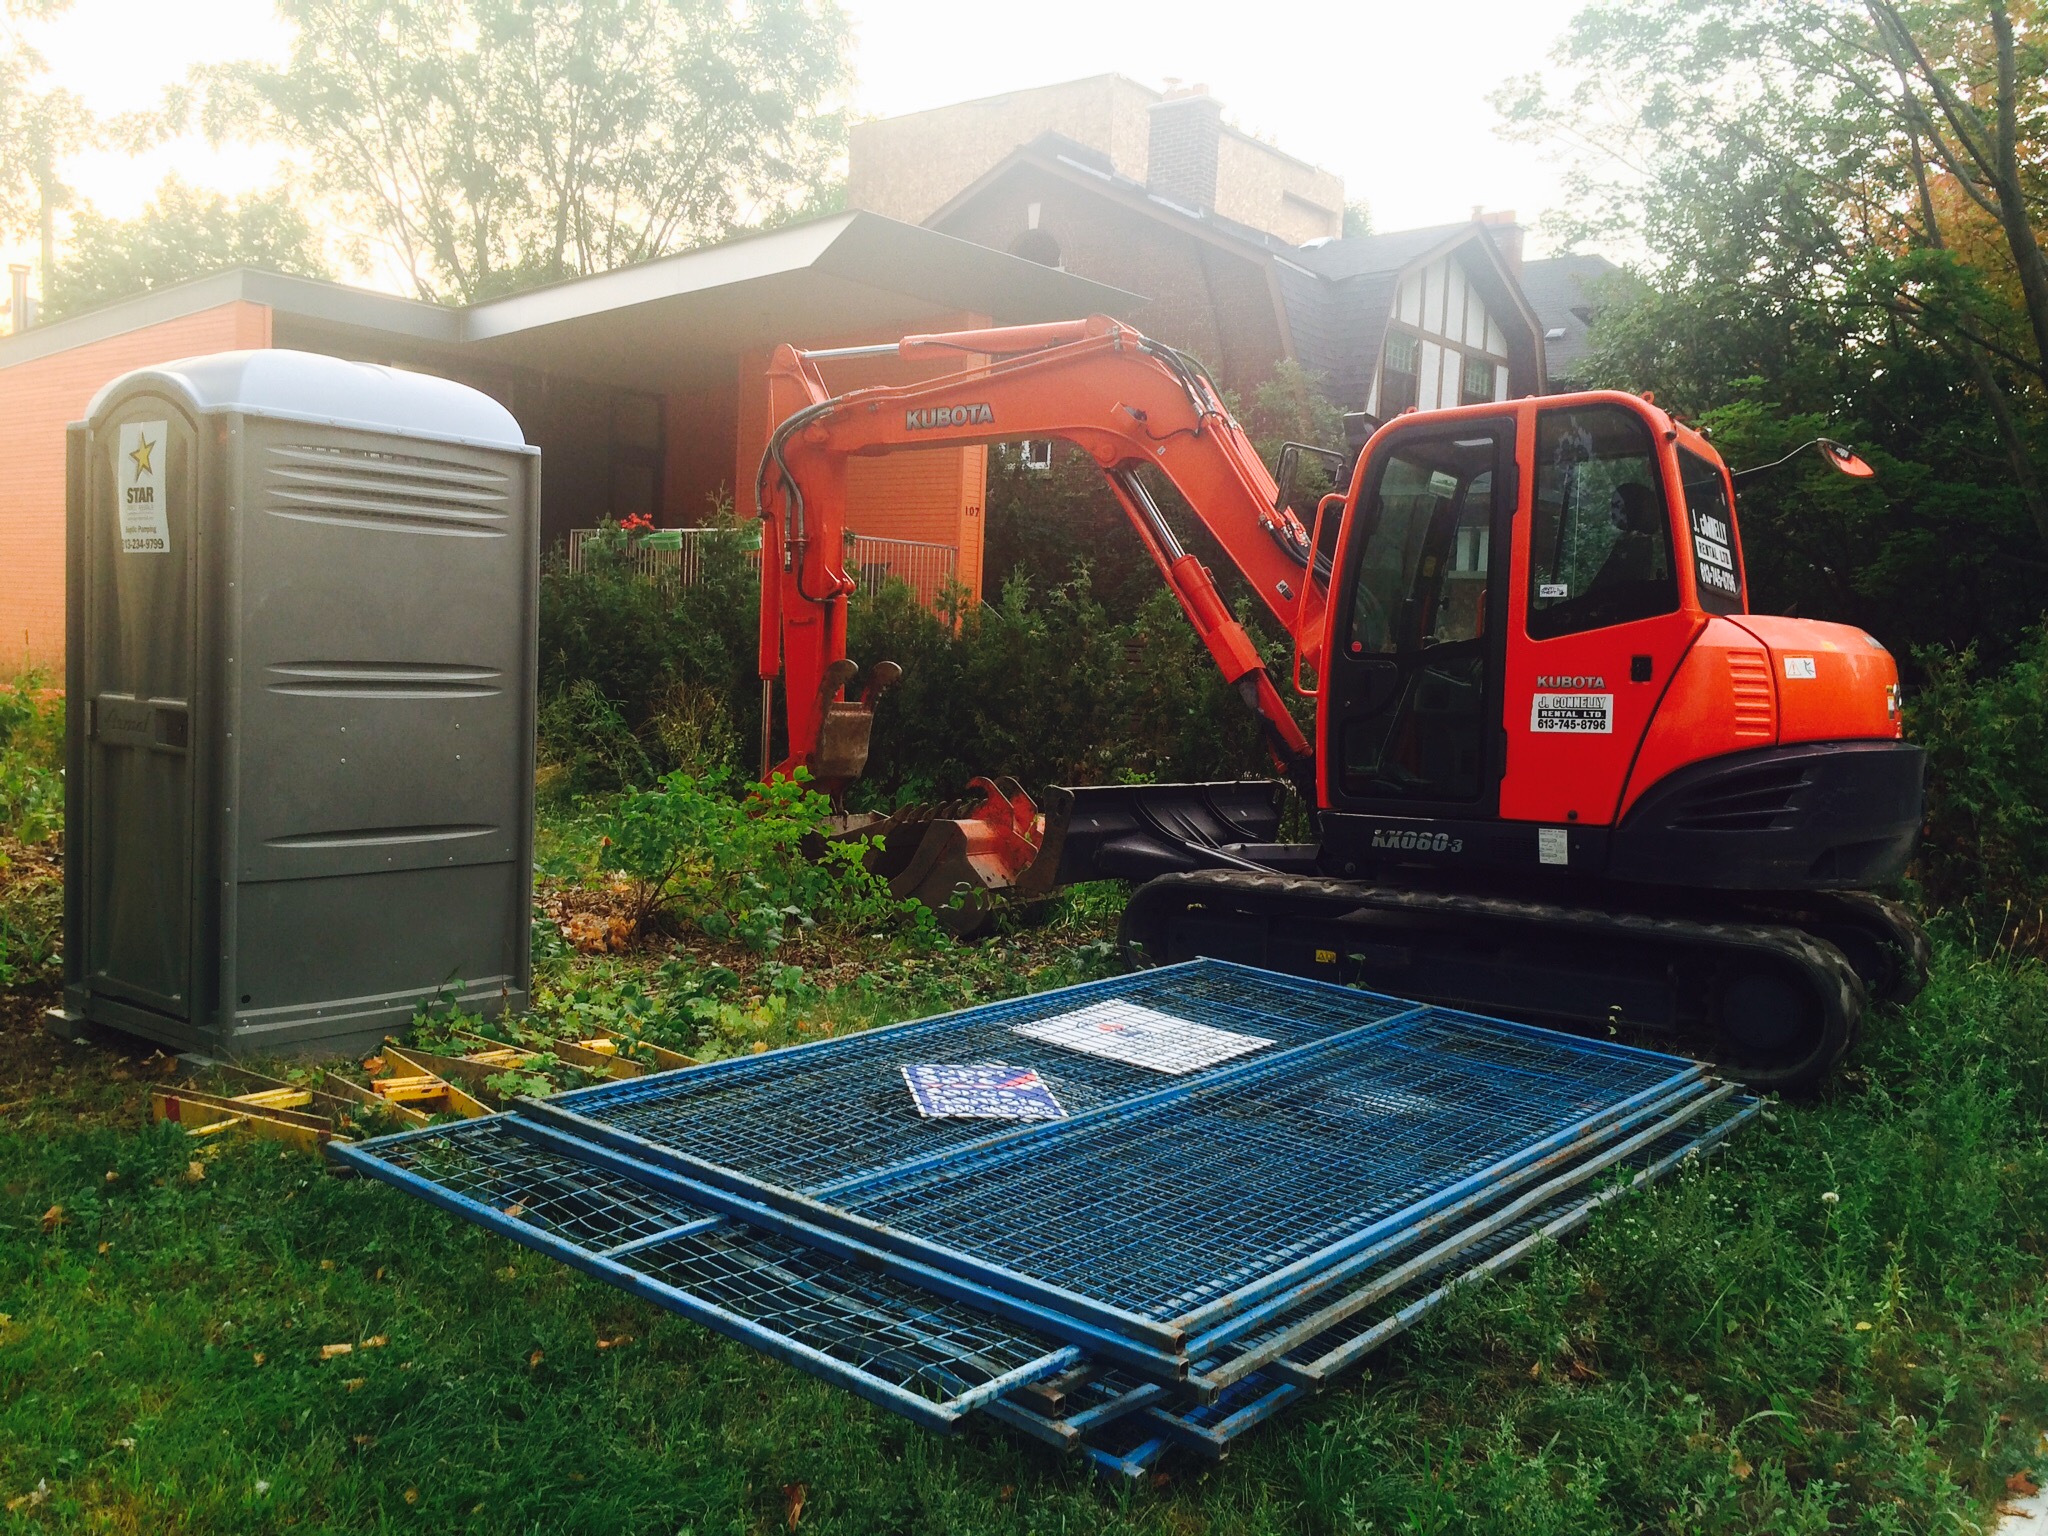
The warm weather has arrived. Our lot is ready and waiting for our house. We’re hoping for a start date soon. While there may be no signs of progress from the lot, much has been going on in the background. Here’s a little update on what we’ve been working on since the snow has melted.

As I mentioned earlier, our drawings are in for permit. Our permit is being help up at the moment as the city is waiting for us to provide them with some technical details. We are waiting for our pre-fab builder to provide us with these missing details. We’ve been bugging him and he keeps saying ‘they’re coming’. We’ll see. Hopefully we can connect and sort this out ASAP. You reading this Adam?

We met with our Kitchissippi ward Councillor Jeff Leiper, thanks to a suggestion from one of our followers. We introduced him to the project, to the Passivhaus standard, and got him interested in what will potentially be one of the first homes certified under Passivhaus, and certainly one of the first infill projects to pursue the standard. (I say potentially, because there may be a couple others going for certification this year). We also brought up the issue of waiving or lowering development fees for projects like ours that will put significantly less stress on the city’s infrastructure. He agrees it’s a good idea, but we will likely never realize the benefits of lobbying this issue with our build. Perhaps we will be paving the way for future builds. Urban infill development is a contentious issue. Done poorly, it has the potential to really alter the fabric of a community, in a negative way. Clearly, this is not our intent, which is probably why Jeff was interested in hearing about our project. People in our corner of Hintonburg are passionate about where they live. And so are we. 

On the subject of HIntonburg-ers, A couple weeks back, we invited our immediate neighbours over to walk them through our designs. We want to ensure relations are kept neighbourly. Unfortunately, they’ll have to put up with some construction mess this summer. The orange house was built only a couple summers ago, so they’re definitely sympathetic to the cause. And hopefully our yellow house neighbours will be too. I think they can appreciate that we considered all three houses — how they work together and react to one another — in the design. We couldn’t have asked for better neighbours.

And finally, we’re still negotiating scope and prices with a GC to help us get started on phase 1 — site prep through to interior framing. The build is getting real. We’re looking at costs in earnest and at ways to bring them down. 

Start date? It’s still TBD. We’re anxious to get this ball rolling rolling rolling. Stay tuned.